– "Is it possible to share screen on Skype?"
– "Is screen sharing on Skype free?"
– "How do you share your screen?"
– "How can I share my iPad screen with others?"

There are many similar questions about Skype screen sharing in different forums. Actually, you can share screen on Skype for business or other purposes in several ways.
At present, there are two main ways about sharing Skype screen with others.
You can share your screen with others through Skype directly. Furthermore, it is also supported to record Skype calls for further sharing and management.
- Part 1: How to Share Screen in Skype Directly
- Part 2: How to Share Screen on Skype with UWP
- Part 3: How to Record Screen for Sharing on Skype
Part 1: How to Share Screen in Skype Directly
If you are using a Windows or Mac computer, you can get Skype share screen without any third-party application.
However, you are not allowed to share screen on Skype via iPhone, iPad, Android and other smart phones in the same way.
Check here to share screen on iPhone iPad.
Step 1: Start a voice or video call on Skype
Run Skype program on desktop. Choose the "Phone" button on the top right corner to start a call with a person or a group. Find and click the "+" button to access all features. Then select "Share Screen" option.
You can also choose “Share system sound” to get Skype screen sharing audio.
Step 2: Share screen on Skype Mac or Windows computer
Choose the specific screen you want to share with your friend, especially when you are using multiple screens at the same time.
In another word, you need to choose whether to share the full screen or a specific window under the "Share your screen" category.
Later, click "Start" to start to share screen on Skype Windows or Mac.
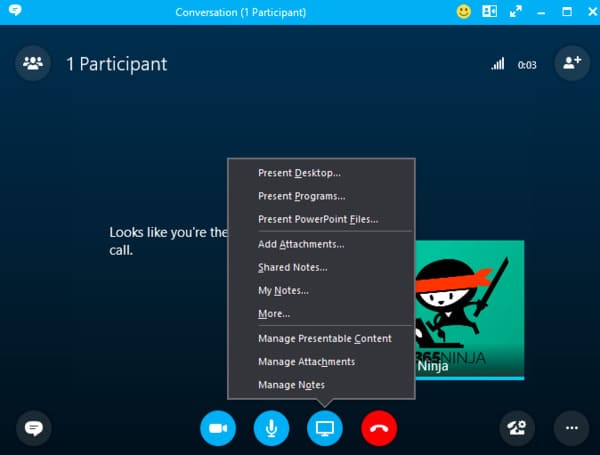
You can see a small window near the right side bottom during Skype screen sharing. When you want to stop Skype sharing, you can choose "+" again to get the "Stop Sharing" option. Here you may also want to know how to record iPhone screen.
Part 2: How to Share Screen on Skype with UWP
If you have updated Skype to the latest version, then you can get one more way to share Skype screen on PC. Actually, you are using the UWP Skype app, which is short for Universal Windows Platform. Well, there are slightly differences between the basic and latest Skype program. Just read and check.
Step 1: Request for Skype screen sharing
Choose one person from your contact list. Then click the "Phone" button to make a Skype call. Find and click the three-dot "More" on the bottom row. Then choose "Share Screen" to share your Skype video screen with others.
If you want to share screen on Skype with audio, you should choose "Share screen and sounds" instead.
Step 2: Share screen on Skype web
Now you need to select the window you want to share from various displays. Click "OK" to confirm your operation. Sooner, Skype shares screen according to your preference. Well, if you are not sure whether you share Skype screen with the correct person, you can choose "Sharing Desktop" on the lower right corner to have a check.
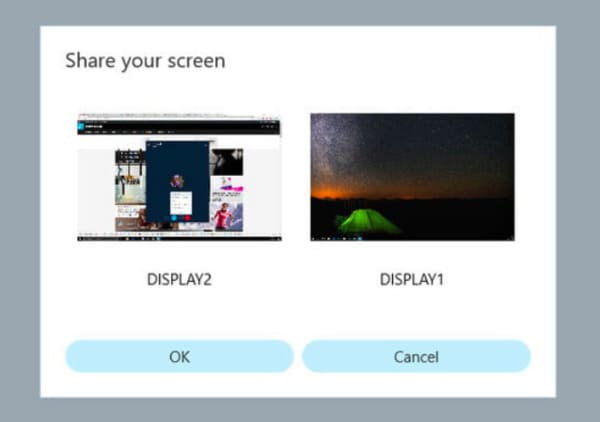
The moment you hang up the Skype call, the Skye screen sharing will stop at the same time. However, if you want to continue talking without sharing, you can select "Stop Sharing" from the "More" list to stop it.
Part 3: How to Record Screen for Sharing on Skype
What if your Skype screen sharing not working? Moreover, how to share Skype screen with someone later?
During this time, you can record Skype video call with audio by using Apeaksoft Screen Recorder smoothly and easily.
The software can record not only Skype video and audio calls, but also other on-screen activities including gameplays, video tutorials, business conferences like Zoom meeting and more. All built-in features are collected into a well-designed interface. Thus, novices can record Skype screen for sharing effortlessly.

4,000,000+ Downloads
Record any video/audio and capture screen on Windows and Mac.
Freely record system audio, microphone audio or both.
Manage the output video/audio/screenshot settings and preferences freely.
Record Skype call smoothly with no interpretations.
Apart from Skype, it records Omegle video call, Hangouts, etc.
Offer various editing tools: drawing panel, changeable cursor, watermark, etc.
Steps to Record Video Call for Skype Screen Sharing in High Quality
Step 1: Launch Screen Recorder
Free download and install Apeaksoft Screen Recorder. Then launch the Skype screen recorder software. Choose "Video Recorder" in the main interface.

Step 2: Customize screen size
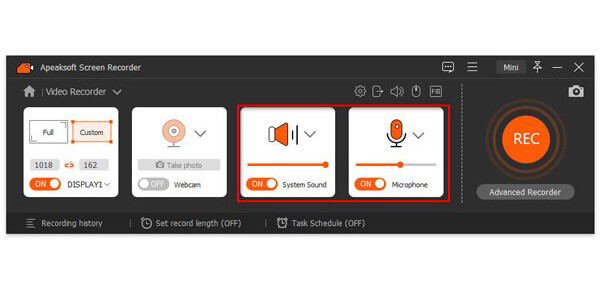
Use mouse to draw the area you want to record directly. Of course, you can enter into full screen or other customized regions, too. Then trigger the on-off option before “System Sound” and “Microphone” to set the audio source.
Step 3: Adjust the output settings (optional)
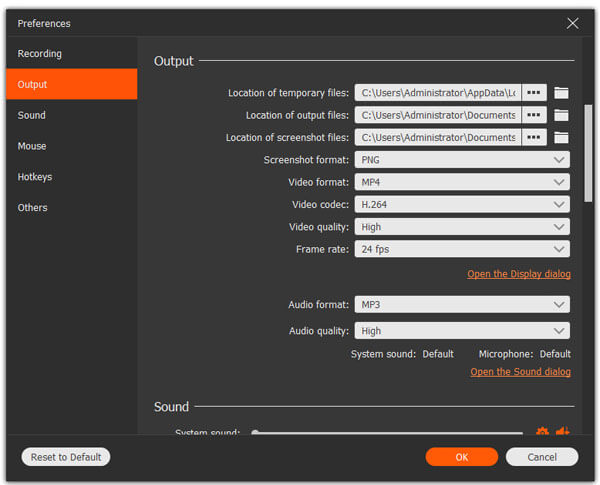
Choose "More settings" option on the top. Well, you can personalize the video/audio/screenshot format, video quality and other settings in the "Preferences" window quickly. Just click "OK" to save your change and exit the window. As a result, you can get more choices than the simple Skype screen sharing.
Step 4: Record Skype screen video with audio
After all preparations, you can click the red "REC" button to start recording the Skype video call.
Well, it’s OK if you only want to record the certain conversations in the Skype call. Just use the "Pause" and "Restart" buttons. When the process finishes, you can get a preview window. Choose "Save" to continue. Then click “Next” to get your Skype screen recording file in the left panel.
Of course, you can share the Skype video to YouTube, Facebook and other sites in one click.
Conclusion
Finally yet importantly, recording your Skype call is also a good way to keep your previous memories and important evidences. Thus, even though you can share screen on Skype for business, meeting or other serious conversations directly, you had better run Apeaksoft Screen Recorder to record the video for backup. It will not interpret or slow down your computer performance.


