As a vogue for listening to music in the last 20 years, the iPod has been a memory for many people. Now, exporting music from iPods to computers to play them is more people’s choice. This article will show you how to transfer music from iPods to computers safely and without losing your data by mistake.

- Part 1: Why Transfer Songs from iPod
- Part 2: The Easiest Way to Transfer Music from iPod to Computer/iPhone Directly
- Part 3: How Do I Transfer Songs From iPod to PC [Windows] (With iTunes)
- Part 4: How to Transfer Music From iPod to Computer [Mac] (With Finder)
Part 1: Why Transfer Songs from iPod
Apple issued the first iPod product, the iPod (Scroll Wheel), in 2001 and has ceased producing iPods since 2022. With the development of smartphones, iPods have generally been substituted by the iPhone and become part of history. They are no longer suitable and convenient for storing and playing music.
Therefore, we transfer music to the computer to facilitate listening, reserving, backing up and sharing music. Besides, if our old iPods crash, we can recover music from them after transferring them to computers and reveal our long-closed memory.
Now, let’s see how can we move music from iPods to computers.
Part 2: The Easiest Way to Transfer Music from iPod to Computer/iPhone Directly
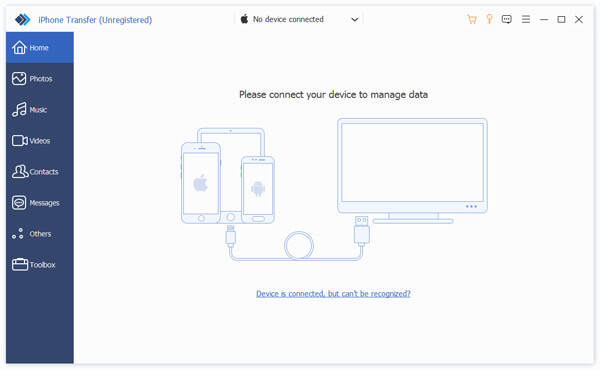
Apeaksoft iPhone Transfer is a free and reliable iOS data transfer compatible with Windows and Mac. We can transfer music data between computers, iOS, and iTunes with it. It has a user-friendly interface expedites our transfer process as effortlessly as skimming through and selecting files on our computer. Moreover, with iPhone Transfer’s 60x speed, data can be transferred rapidly, and we don’t have to wait wearily. Let’s move on to instructions about how to transfer music from iPods to iPhones/computers.
Step 1Connect iPod to Computer
Double-click the software to launch the program > connect the iPod to your Windows or Mac computer via a USB cable > the program will automatically detect the iPod device.
Step 2Select Music Files
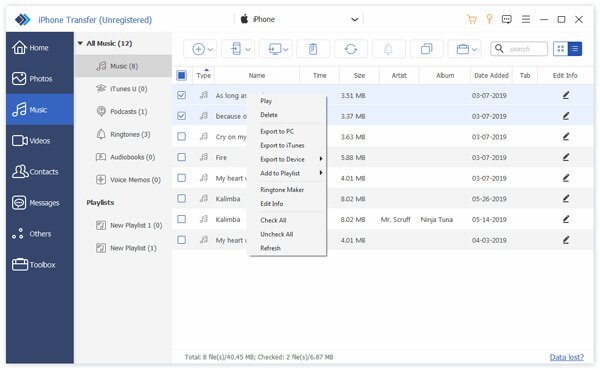
Select Music in the sidebar > on the right side, select songs you want to transfer to your computer or click the select all box.
Step 3Add Files to the Computer or iPhone
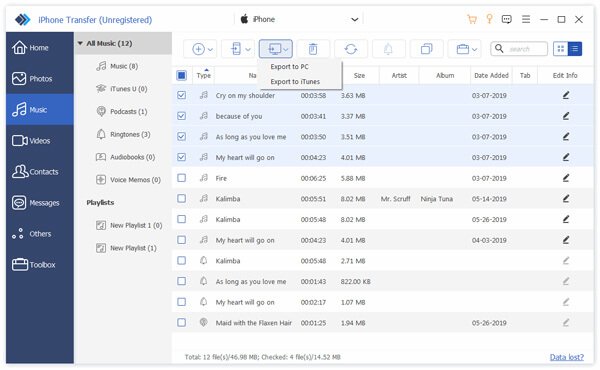
Click the little desktop button > choose Export to PC/Export to iPhone, and all selected songs will be transferred to your computer or iPhone.
Tips when transferring music from iPods:
1. If the right side doesn’t show any files, they may be destroyed accidently, and you have to recover your iPod data first.
2. In Step 2, you can right-click each file to manage them, like edit its information or make a ringtone.
Part 3: How do I Transfer Songs From iPod to PC [Windows] (With iTunes)
iTunes is a multimedia player and file manager of Apple. We can easily backup and sync music to our iPods and iPhones. Users can buy music, movies, and other multimedia content from the iTunes store. If your computer is Windows system or Mac system lower than macOS Catalina, read through and see how to export music from iPod to PC with iTunes.
Step 1Connect the iPod to the computer via a USB cable.
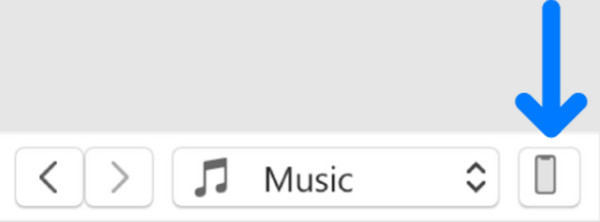
Step 2Open iTunes and click the device button on the top left corner.
Step 3Select the APP from which you want to transfer files.
Step 4Right-click the files you want to transfer and click Save to so you can save them to the folder in your computer.
Tips about transferring songs from iPod to PC with iTunes:
1. If iTunes doesn’t recognize iPods automatically, try the original cable or update iOS to the latest version.
2. Be sure to turn off sync items automatically from iTunes to avoid erasing your iPod’s data.
Part 4: How to Transfer Music From iPod to Computer [Mac] (With Finder)
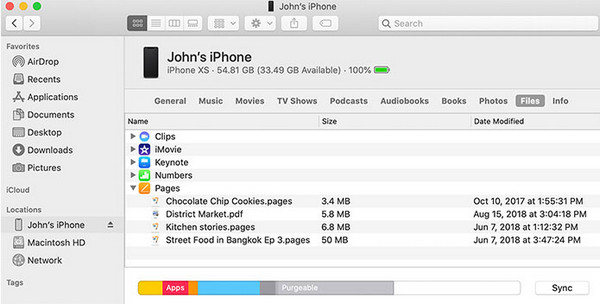
If your Mac version exceeds MacOS Catalina, iTunes doesn’t work for you. Apple divided the file manager, backup, and sync functions into Finder in 2019. Fortunately, the interface of Finder is similar to iTunes. You can follow the iTunes exactly same instructions and transfer your songs using Finder.
Conclusion
With our recommended methods, you can undoubtedly master how to transfer music from iPods to a computer. Generally, iTunes and Finder are convenient because they are Apple’s official programs, but sometimes, we erase data using them accidentally, which we don’t really mean to. Therefore, Apeaksoft iPhone Transfer is the best transfer because we can quickly transfer songs from iPods to computers or iPhones. What method do you prefer? Feel free to leave your comment, and don’t share this article with your friends!

