Have you ever considered moving your favorite songs or playlists from iTunes to your iPhone, so that you are able to enjoy the music anytime and anywhere? Luckily, this tutorial is going to discuss how to sync iTunes playlist to iPhone. You can learn two different solutions through this article, via iTunes directly or using a professional transfer tool. If you are interested in this topic, read on and learn more details about the two methods to sync iTunes playlist to iPhone.

- Part 1: How to sync iTunes playlist to iPhone with iTunes
- Part 2: How to add playlist to iPhone via iPhone Transfer
- Part 3: Compare files between different transfer methods
Part 1: How to sync iTunes playlist to iPhone with iTunes
When it comes to adding iTunes playlist to iPhone, the most direct and easiest way is to use iTunes itself. Besides playlist and music, you can also move photos, videos to messages, contacts, emails, and other type of files from iTunes to your iOS device.
Keep on reading and learn how to sync playlist from iTunes to iPhone via iTunes:
Step 1: Connect iPhone to computer
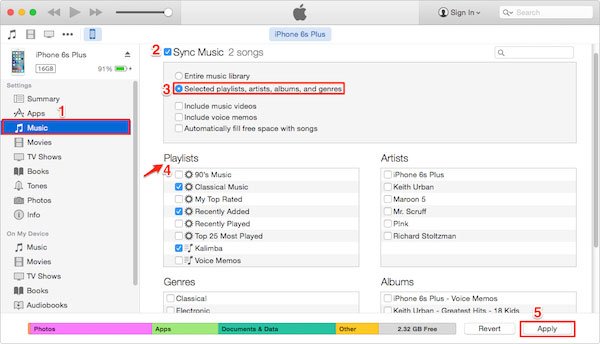
Connect the iPhone to your PC or Mac with the USB cable, and then launch iTunes. You can see your iPhone is shown on the upper left corner of iTunes, and all the playlists on the left side.
Step 2: Choose Sync Music
Move the mouse to the sidebar and click on Music. Then tap on the "Sync Music" button, tick the second option "Select playlists, artists, albums, and genres".
Here you can add songs to a playlist on iTunes in advance for easy sync. (iTunes won't let me add music?)
Step 3: Select converted playlist
Next target on the Playlists section, and tap on "Apply" button to sync your selected playlist to your iPhone.
Step 4: Check newly added playlist
Finally, you can tap "On this iPhone" button on the top of screen to check if the selected playlist has been added to your iPhone.
Make sure all the songs in the converted playlist are in your iTunes so that the whole playlist can be added to your iPhone successfully. What’s more, iTunes may run a little bit slow during the transferring. It is common, especially when there are many files managed by iTunes. Just wait patiently.
Part 2: How to add playlist to iPhone via iPhone Transfer
There is one major risk to add playlist from iTunes to iPhone, if there is any error for iTunes, the existing songs will be lost forever. To sync iTunes playlist and songs to iPhone without any loss, Apeaksoft iPhone Transfer should be a versatile program you need to take into consideration.
1. Transfer all kinds of files, including playlist, music, messages, photos, books, movies, etc.
2. Preview and mange the files between iPhone and other iOS device with ease.
3. Edit media files like deleting, renaming, creating playlists, etc. on your computer.
4. Add or export your preferred electronic books as PDF or ePub on iPhone iPad or iPod.
5. Break the restrictions of iTunes when you transfer files to iPhone, or vice reverse.
Follow the step-by-step guides to learn how to transfer playlist from iTunes to iPhone:
Step 1: Download Apeaksoft iPhone Transfer
Download and install this transfer tool on your PC or Mac. You can find this software in the official website of Apeaksoft, after that launch the program on your computer.
Step 2: Connect iPhone to PC/ Mac
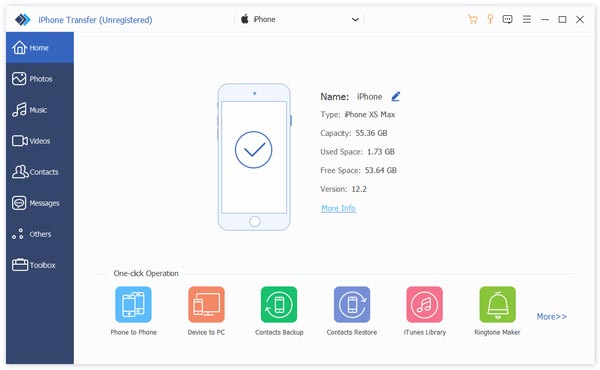
Then connect your iPhone to the computer via a lightning cable. Once connected, this transfer tool will detect your iOS device automatically.
Step 3: Import iTunes playlist
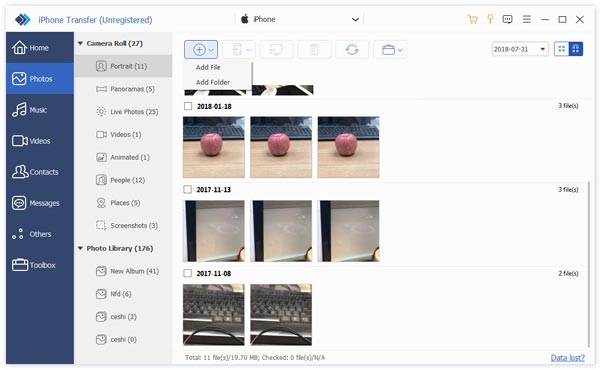
Next launch iTunes app, find and select a playlist that you are going to add to your iPhone. And you are able to drag and drop it from iTunes to this iPhone Transfer directly.
Step 4: Check iTunes Playlist
After transferring, the newly added iTunes playlist will be on the folder of your iOS device, and you can check it in iPhone Transfer.
Part 3: Compare files between different transfer methods
| iTunes | Apeaksoft iPhone Transfer |
|---|---|
| iTunes facilitates the management and purchase of files, including music, movies, and etc. | Apeaksoft iPhone Transfer provides a comprehensive backup of your iOS device, which could be an alternative to iTunes when your iTunes gets corrupted. What’s more, the recovery process is simple enough and totally safe, without any loss of data. |
| iTunes backup concludes basic settings and photos from your iOS device, but does not contain playlists, songs, videos and other files, which is mainly used to recover your iPhone/ iPad/ iPod Touch. | Apeaksoft iPhone Transfer is the best transfer tool to help you sync and transfer all kinds of files from PC, Mac to iPhone, iPad and iPod Touch, including music, playlist, contacts, messages, photos, books, movies. |
| iTunes is limited to viewing data after transferring files to your iPhone/ iPad/ iPod Touch. | Apeaksoft iPhone Transfer enables you to preview and check the newly converted data during the transferring process, and guarantees no iTunes errors. |
| iTunes only offers single-way transferring. | Apeaksoft iPhone Transfer enables you to transfer from iPhone/ iPad/ iPod to computer, transfer from computer or iOS device to iPhone/ iPad/ iPod, as well as sync files between different iOS devices. |
Conclusion
This passage is an ultimate guidance about how to sync playlist from iTunes to iPhone. (For exporting iTunes playlist to Spotify, Text, etc., please cehck it here.)
iTunes is easy to use, but is quite limited. And Apeaksoft iPhone Transfer, as an overall transfer program, provides more comprehensive solutions for you to add iTunes playlist to iPhone/ iPad/ iPod Touch. To sum up, it deserves you to have a try.
At last, if you have any other query about moving playlist and music from iTunes to iPhone or iPad, please share your thoughts in the comment. And do not forget to share this passage to your friends on Facebook and other social websites if you like this article.

