It is well known that iPhone and iPad do not have file systems that you can access. Fortunately, iTunes File Sharing feature allows you to copy files to and from your apps. Although many iOS users rely on iTunes to back up and manage their data, only a few understand how to use the iTunes File Sharing features. Therefore, we share this tutorial.

- Part 1: What Is iTunes File Sharing
- Part 2: How to Use iTunes File Sharing
- Part 3: Best Alternative to iTunes File Sharing
Part 1: What Is iTunes File Sharing
As mentioned previously, iTunes File Sharing is a feature to transfer files to or from iOS device. However, not all apps are available to this feature. You can get it after connecting iPhone to your computer.
Part 2: How to Use iTunes File Sharing
To use iTunes File Sharing, you need some basic requirements:
- 1. The latest version of iTunes.
- 2. The latest version of Mac OS or Windows 7 and later.
- 3. Up iOS to the date on your iPhone, iPad or iPod Touch.
- 4. The apps that work with iTunes File Sharing.
After updating, follow the steps below to transfer files using iTunes File Sharing
How to See Which Apps Supported by iTunes File Sharing
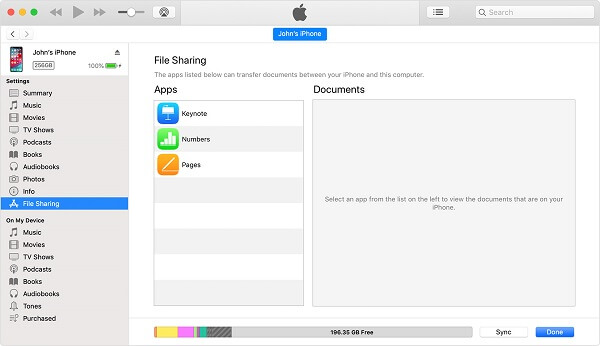
Step 1. Open iTunes and connect your iOS device to the computer with a Lightning cable.
Step 2. Click the Device button and go to the File Sharing tab from the left sidebar.
Step 3. All iOS apps listed on the right side can work with iTunes File Sharing feature.
Note: Both native apps and a part of third-party apps are available to iTunes File Sharing feature.
How to Transfer Files from PC to iOS via iTunes File Sharing
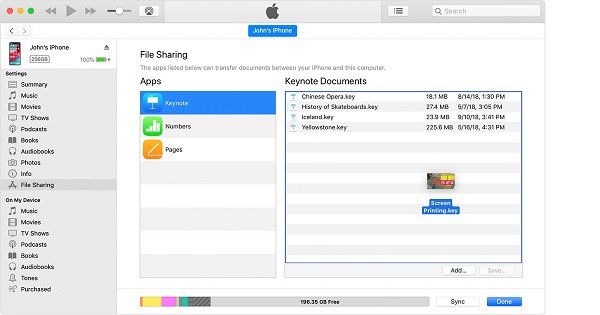
Step 1. Link your iPhone with your computer with a USB cable and open iTunes.
Step 2. Click the Device button, go to the File Sharing tab, and select the target app.
Step 3. Open a Windows Explorer, find and select the document you want to transfer to the app, and drag and drop them into the Keynote Documents area.
Note: Bear in mind that only the files that work with the app can be transferred via iTunes File Sharing. If you are not sure, check the app’s user guide to get the file types supported.
How to Transfer Files from iOS Apps with iTunes File Sharing
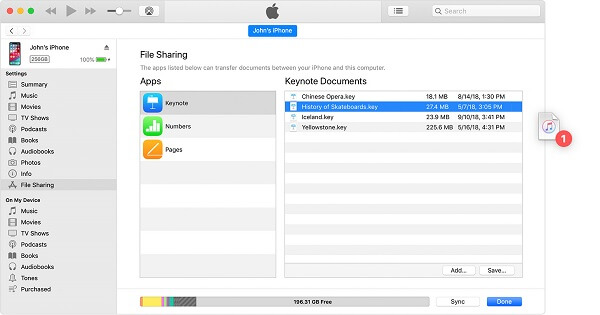
Step 1. Locate the app in iTunes’s File Sharing section after connecting your iPhone.
Step 2. Browse the file library in the Keynote Documents panel and, and drag and drop the file to your desktop. You can also select the files, and click Save button to transfer them to your hard drive.
How to Delete a Shared File from iPhone
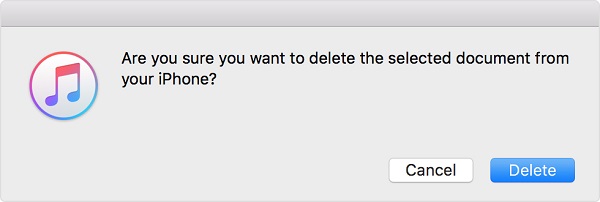
Step 1. Hook up your iOS device to your PC via a USB cable, open iTunes and click the Device button.
Step 2. Head to File Sharing, select the app and choose the files you want to delete.
Step 3. Press the Delete key on your keyboard, and click the Delete button when prompted.
How to Enable Wireless iTunes File Sharing
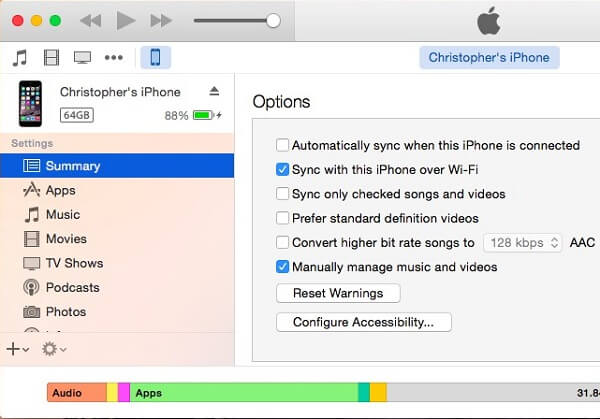
Step 1. To set up wireless connection, you also need to hook up your iPhone to the computer with a USB cable. Then open your iTunes.
Step 2. After your iPhone is detected, click the Device button and go to the Summary tab.
Step 3. Locate the Options area and check the box next to Sync with this iPhone over Wi-Fi and uncheck Automatically sync when this iPhone is connected.
Step 4. Quit iTunes and disconnect your iPhone. The next time when you want to use iTunes File Sharing, connect both your iPhone and computer to the same Wi-Fi network.
More details can be found here about iTunes Wi-Fi sync.
Part 3: Best Alternative to iTunes File Sharing
It cannot be denied that iTunes File Sharing is a convenient way to transfer files between computer and iOS device. However, Apple has introduced too many features into iTunes. That makes iTunes plump. So, we recommend Apeaksoft MobieTrans, the best alternative to iTunes File Sharing.
- Transfer files between iPhone and PC, Android or another iPhone.
- Support almost all data types and apps on iOS devices.
- Keep the original condition of your files when transferring.
- Available to iPhone 16/15/14/13/12/11/X or earlier, iPad and iPod Touch.
In a word, MobieTrans is the best option to transfer data to and from your iOS device.
How to Use The Best Alternative to iTunes File Sharing
Step 1. Install MobieTrans to your PC
Plug your iPhone to your computer with the Lightning cable came with your device. Open the best alternative to iTunes File Sharing after installing it on your PC.
Once your device is recognized, you will be taken to the data type window.
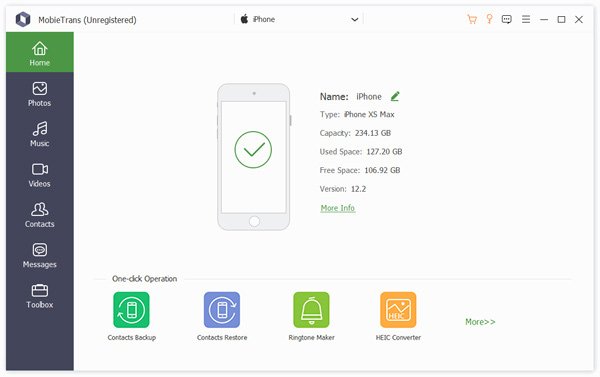
Step 2. Add files from PC to iPhone
Go to the desired data type, such as Photos, click the Plus button on the top ribbon to trigger the open file dialog. Find the photos you want to add to iPhone and transfer them to your iPhone. The program is able to encode the files for iOS automatically.
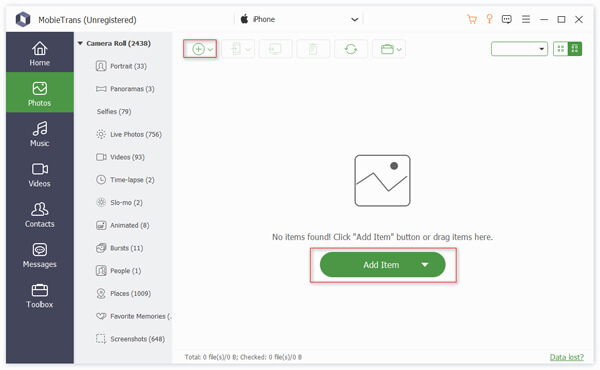
Step 3. Backup files from iPhone to PC
To transfer your photos to your hard drive from iPhone, for example, go to the Photos tab to browse iOS photos. Check the desired photos and click the PC button on the top of the window. Once select your PC, the selected photos will go to your hard disk.
Wait for the process to finish, and then disconnect your iPhone.
Note: MobieTrans relies on the physical connection and hardware acceleration to improve the performance. Moreover, it has the ability to sync files between iPhone and Android directly.

Conclusion
Now, you should understand what is iTunes File Sharing, what it can do and how to use it to transfer files from or to iOS app. File Sharing is another useful feature in the latest version of iTunes. It allows you to transfer files between computers and a part of iOS apps. If you do not like iTunes, try Apeaksoft MobieTrans. It offers more benefits and advantages than iTunes. If you have troubles or questions, please leave a message below this post.


