Not all Mac files are meant to be seen by others. Sometimes, it’s quite necessary to use a password to better protect the specific Mac data. Using encryption and password protection is a regular and effective way to ensure security. In that case, you have to rely on a secret key or password to access an encrypted file. Here comes the question, do you know how to encrypt files on Mac?

As it mentioned above, encryption is a good way to protect sensitive data that you prefer to access by yourself. Actually, the process of encrypting files is quite easy. Here in this post, we will focus on what Apple has already provided you to encrypt files on macOS. What’s more, a great Mac file encryption tool will be recommended to help you secure Mac files and folders with ease.
- Part 1: How to Encrypt Files on Mac with Disk Utility
- Part 2: Best Mac File Encryption Software to Lock Files on Mac
Part 1: How to Encrypt Files on Mac with Disk Utility
There is a common way for you to encrypt files on Mac. In fact, macOS provides you with one built-in Mac file encryption software to lock a Mac file. With the Disk Utility app, you can easily protect the sensitive files and folders from others. Here in this part, we will show you how to encrypt files on Mac with the Disk Utility.
Step 1 First, you need to open Disk Utility on your Mac. To do that, you can open Applications and then choose Utilities. Then you can find and open the Disk Utility software. Also, you can use the “Spotlight Search” to quickly locate it.
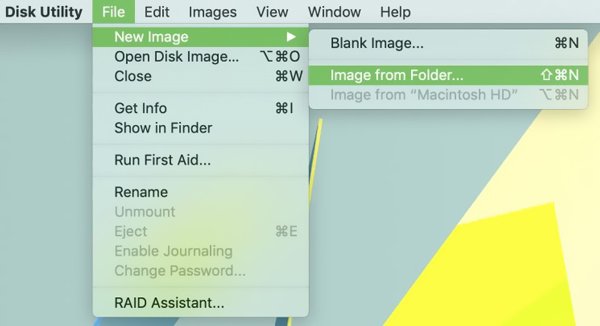
Step 2Now you can search for and choose the specific folder you want to encrypt and protect. Click Choose when you find it. Then choose the location for this new folder image in the next window. During this step, you can rename the folder or add a tag.
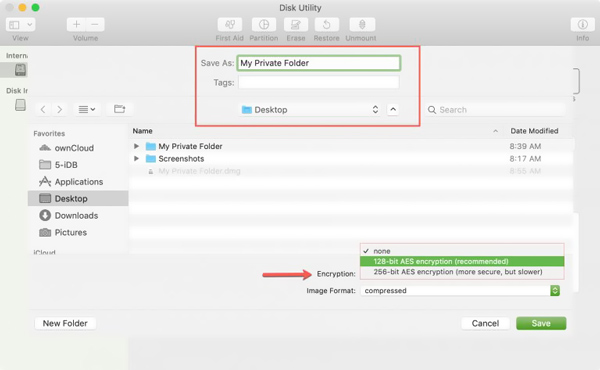
Step 3Click on the Encryption and you are given two encryption options, 128-bit AES encryption and 256-bit AES encryption. Relatively speaking, 128-bit AES encryption can give you a faster encryption/decryption process and 256-bit AES encryption can offer you more secure. Here you can pick either one based on your need.
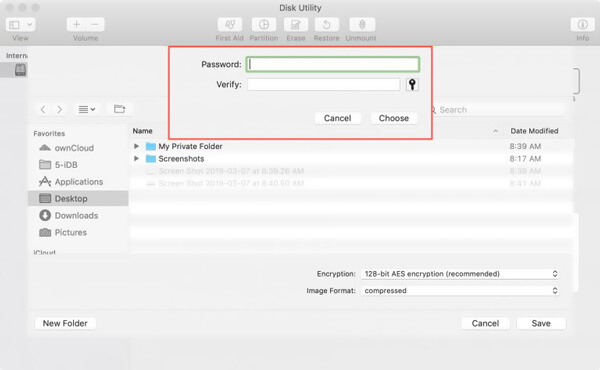
Step 4From this step, you can start to create a password for encrypting Mac files. You will be prompted to create and verify the password. Note that, don’t create a password you may easily forget it later.
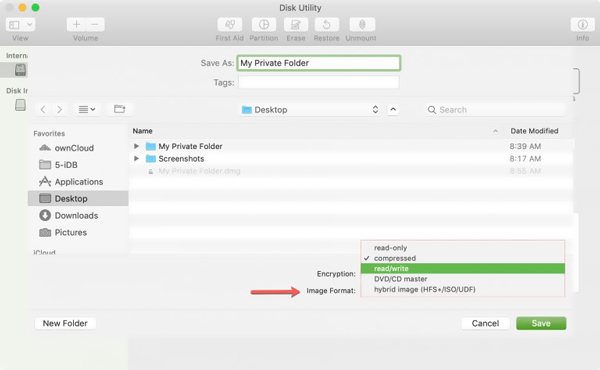
Step 5After creating the password, you can click on the Image Format option. Here are more options provided for you to encrypt your Mac files. You can choose read-only, read/write or compressed according to your need.
Step 6After all these operations, you can click Save to confirm the Mac file encryption. You are allowed to see the whole process of encrypting files on Mac. Click Done to finish the file encryption on Mac.
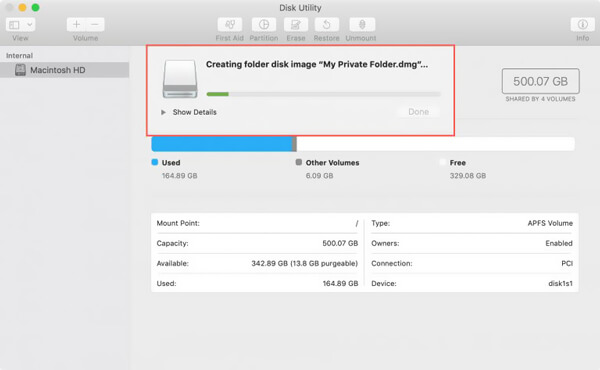
You can encrypt and password protect your folders on Mac by following the guide above. When it is done, you are required to input the password you just created to access all files in this folder.
Part 2: Best Mac File Encryption Software to Lock Files on Mac
Need an easier way to encrypt files on Mac? Here we strongly recommend the best file encryption software, Mac Cleaner for you to lock files on Mac. It is specially designed to optimize your Mac and it has the capability to hide and secure your valuable Mac files.
Mac Cleaner – Best Mac File Encryption Software
- Hide and encrypt files on Mac and set password to secure your privacy.
- Clear up any junk/unnecessary/old/large file on Mac efficiently.
- Check the CPU and memory usage, disk utilization and battery status of Mac.
- Clean, optimize, and maintain your Mac for 100% security.
- Preview junk files, caches, logs, trash files before cleanup and safely delete in one click.
- Directly search for files by file name and order by size, time and so on from scanned result.
How to encrypt files on Mac with the best file encryption software
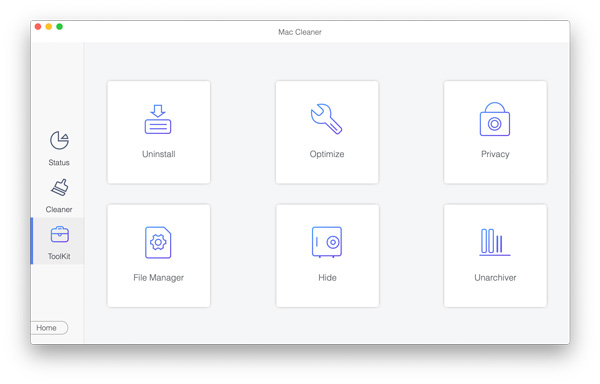
Step 1First, you should double click on the download button above and follow the instructions to quickly install and run this Mac files encryption software on your Mac. When you enter the main interface, choose the ToolKit option.

Step 2Select the Hide feature in the main interface of ToolKit.
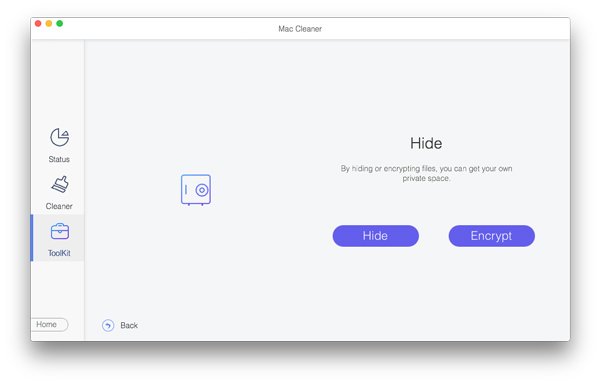
Step 3Here you are offered two options, Hide and Encrypt. Considering that you want to encrypt files on Mac, now you need to choose the Encrypt option. Just click on the Encrypt button.
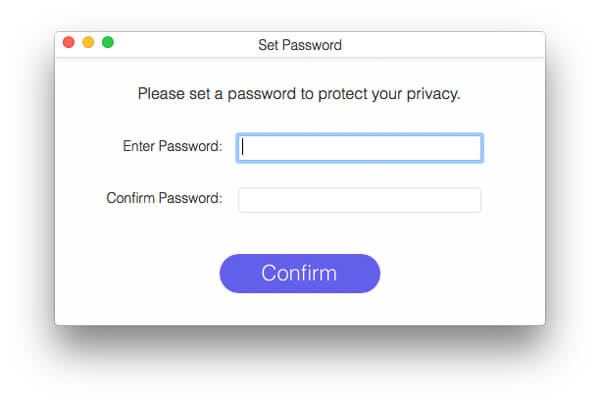
Step 4 A pop up window will appear and prompt you to set the password for Mac data encryption. Similarly, here you need to create a password you won’t forget. Then a new window will guide to select the specific file folder. Here you can easily set password and encrypt Mac files.
Within just a few clicks, you can handily encrypt files on Mac. What’s more, as it shows above, Mac Cleaner can also help you better manage various files on your Mac, remove caches, cookies and other useless data. Just free download it and give it a try.
We mainly talked about how to encrypt files on Mac. After reading this page, you can get 2 simple ways to do that. If you still have any question, you can leave us a message in the comment part.


