Snagit, as the screen capture and recording program from TechSmith, gains the high reputation from Intel, Amazon, Microsoft, IBM, and more. You can use it to capture the process and add your explanation to create a visual instruction.
Would you keep Snagit?
That is a question, because the cost of $49.95 in this software is not a small amount.
This post is the review of Snagit screen capture software.
You can make a wise decision after getting through the review.

- Part 1: Introduction to Snagit Screen Capture
- Part 2: How to Use Snagit Screen Capture
- Part 3. Review of Snagit Screen Capture
- Part 4. Alternative to Snagit Screen Capture
Part 1: Introduction to Snagit Screen Capture
Snagit is the all-in-one image and video capture software for Windows and Mac users. It can take the scrolling screenshots and screen recordings, and then mark up the capture for creating the how-to guides, tutorials, and more quick videos. It provides you with the annotations to make the professional-looking presentations.
Besides, it also offers the step tool smart move, text replacement, simplifies tools stamps and other tools to create the visual presentations.
Part 2: How to Use Snagit Screen Capture
Is this software easy to use? How to use this screen recorder on computer?
That’s what we shall talk in this part.
Step 1 Download Snagit Screen Capture to computer
This screen recording software is compatible with Windows and Mac computer. You can download the free trial version from its official page. Currently, this software has upgraded to Snagit 2020 from 2019, 2018, 2017, 2012, etc.
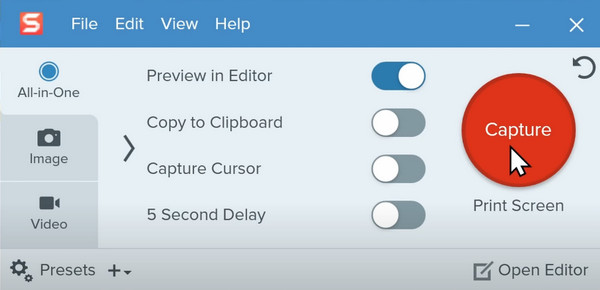
Run it after the successful installation. From the capture window, you will see 3 tabs, Image, Video, and All-in-One.
The interface is easy and pick up the type what you need.
To start your capture, click the red Capture button.
Step 2 Select the recording area
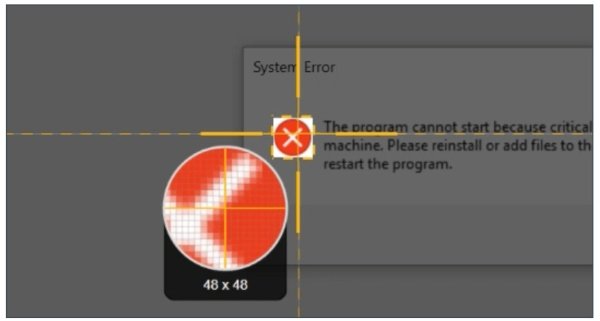
Take the crosshairs to select what region you want to capture. You can hover over window or region to auto-select the recording area. Alternatively, you can click and drag across a region to make a freehand rectangle selection.
Step 3 Start capturing
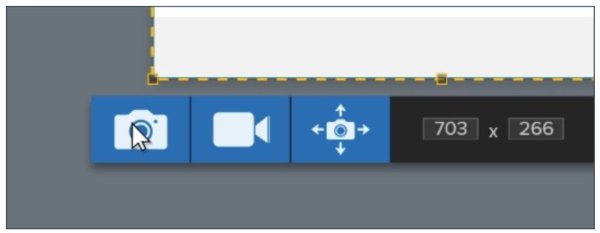
After releasing the crosshairs and you can preview the selected recording region. Want to change the region? Just use the handles at the edges to make the adjustments.
Then click the recording tool from an image, video or panoramic capture from the toolbar at the bottom.
Step 4 Edit and save screen recording
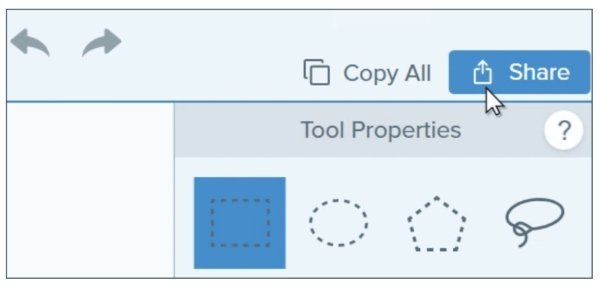
When the screen capture is done, the capture will be brought into the Snagit editor automatically, where you can add callouts, arrows, and much more.
When all the editing effects are complete, just open the Share menu and choose one destination to save the recording.
You can also send the recording to screenast.com and share the recording by sending the URL.
The whole process is smooth without any interruptions.
The only thing that you need to spend more time is editing the screen capture.
Part 3: Review of Snagit Screen Capture
Though it is use, how about the other features of this software?
Now, let’s check the review of Snagit Screen Capture.
Snagit’s Workflow

- PROS
- Simple to start the screen capture.
- Interface is user-friendly.
- CONS
- Lack of settings or toolbar in interface.
Snagit’s workflow is very intuitive. The whole interface is very simple and easy to access. The interface is user-friendly and can let you capture from video to image and make the switch seamlessly. Moreover, you can change your mind of recording way after selecting the area.
Besides, the all-in-one recording mode lets you make all the pre-settings to avoid any trouble while recording.
Snagit’s Video Recorder
- PROS
- Easy to start capture a video.
- Record video and audio.
- CONS
- Lack of video editing tools.
- Recording process is laggy occasionally.
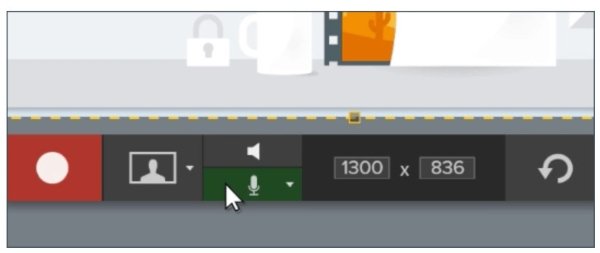
Snagit offers you an easy way to record a video. It lets you select the customized area or the specific window or region by hovering over. It can also let you capture the picture-in-picture video call or game by supporting the webcam recording. Moreover, it can let you choose audio for recording.
Snagit’s Image Screen Capture
- PROS
- Capture a scrolling screenshot.
- Edit the screenshots with more tools.
- CONS
- The editing tools are slow-responsive.
Image screen capture is one of the best part of this software. It can work as the snipping tool to take the screenshots, even the wide and horizontal scrolling capture on computer. When you want to make an image presentation, the editing tools from Snagit can meet almost all your needs.
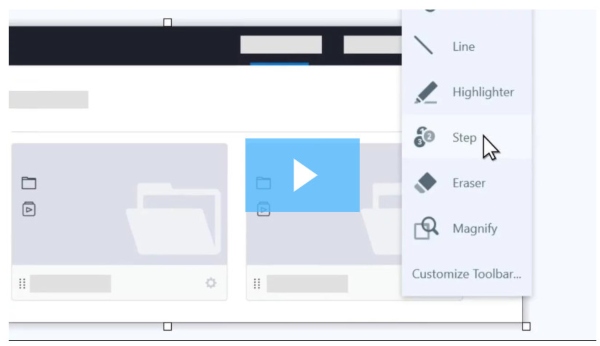
The Snagit Editor can markup and edit the images with arrows, text, callouts, and more. The Step tool lets you identify the parts clearly. You can also customize the annotations to drop hadow, shape, line thickness, and much more. You can use the Effects tool to enhance images like borders, the torn edge effect, etc.
In one word, Snagit Screen Capture is a nice screen capture software when you want to make an image presentation. As for video tutorial maker, you may need to think twice.
Part 4: Alternative to Snagit Screen Capture
For getting a better alternative to Snagit, Apeaksoft Screen Recorder will be the best answer.
It is the all-in-one video recorder, image capture and audio recording software for Windows and Mac users.
Screen Recorder – Best Alternative to Snagit
- Capture any screen from desktop, browser and webcam for video tutorial presentations.
- Record any audio from computer system and microphone to create your own narration.
- Take a screenshot with various editing tools for the image.
- Edit the video while recording the screen, like text, callout, shape, spray, etc.
- Advanced recorder can record the specific window and remove unwanted parts.
Initiate this software from the capture window, which contains three tabs: Screen Capture, Video Recorder, Audio Recorder and More.
Screen Capture – Free Screenshot Tool like Snagit
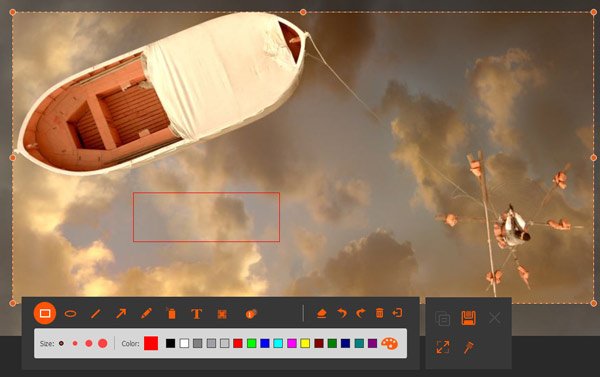
After clicking Screen Capture, your mouse will become the crosshair. Hover over the windows to capture the window. Or click the mouse to draw the region in rectangle. Release the crosshair to preview the screenshot you take, where you can use the shape, arrow, spray, text, eraser, pin to screen, and more options to handle the screenshot.

Video Recorder – Capture Any Screen
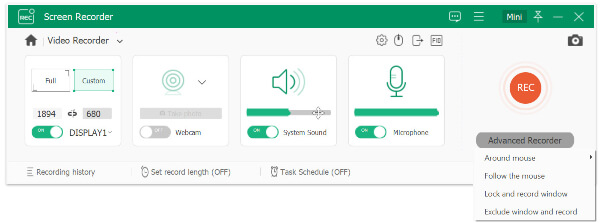
Click Video Recorder, and you will be directed to the video recording window. Here you can select recording region by Full or Custom (fixed region and freehand region). The Webcam option can create the picture-in-picture recording. Moreover, the microphone and system audio are optional for you to record video and audio.


Advanced Recorder – Exclude or Include Window Recording
Under Video Recorder, you will find Advanced Recorder under the REC button, where you can select to Around mouse, Follow the mouse, Lock and record window and Exclude window and record. You can easily record any window, even the background recording is supported while doing other operations.

Video Editor – Edit Video Recording
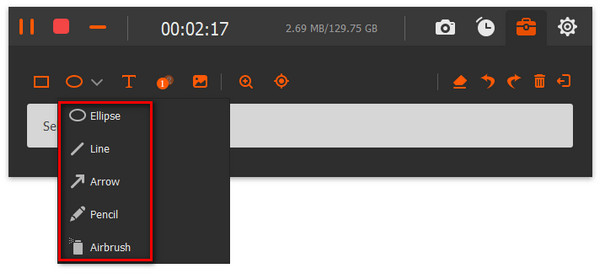
Inferior to Snagit, Apeaksoft Screen Recorder can edit the video file while recording. You can draw the line, shape, add the arrow, input the caption, add the step, spray the color or undo the option by the eraser to edit the video recording. While previewing the recording, you can also use the clip feature to split the video recording file.

Task Schedule Recording
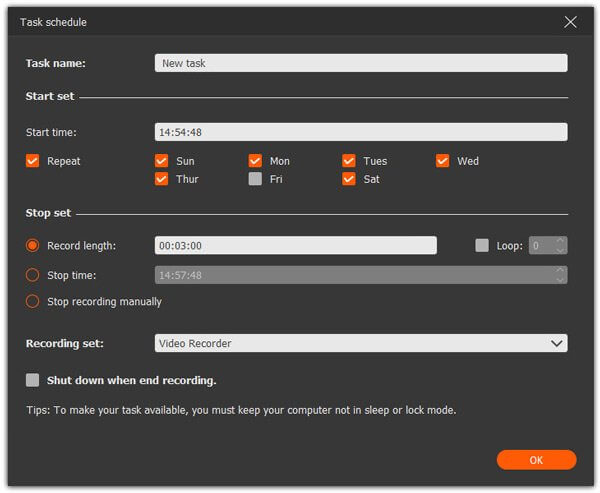
Busy and get no time to record? Just try Task Schedule. You can create any task by setting the time, recording length, and the operation after the recording is done. Without sitting in front of the computer, and you can easily capture the recording task easily.

In one word, it can be the best replacement of Snagit Screen Capture to capture a video or take a screenshot.
Conclusion
Snagit Screen Capture is the tool that can make the video visual presentations. However, the price and the problem of Snagit scrolling image capture make some of you give up this software. Apeaksoft Screen Recorder will be the best alternative to Snagit to capture image and videos on Windows and Mac computer.
Do you have any suggestion?
Do not hesitate to leave your comments below.

