Nintendo Switch is a wonderful video game console. But what's the best way of capturing Nintendo Switch gameplay? I'm going to walk you through some easy methods in this article. So let's get started!

- Part 1. What You Need to Know About Recording Switch Gameplay
- Part 2. How to Record or Stream Switch Gameplay
- Part 3. FAQs about Recording Switch Gameplay
Part 1. What You Need to Know About Recording Switch Gameplay
Every current generation gaming console has some kind of share button but the Nintendo Switch has probably the least powerful recording features and no built-in streaming options. But it's still possible to record good gameplay footage from your Switch but it's going to take some more effort. Whether you wanted to make videos for yourself your family and friends or you wanted to dive into gaming content creation, I'm going to show you three easy ways to get started.
Part 2. How to Record or Stream Switch Gameplay
Method 1. Use the built-in function
The first method is free and it's available to anyone with a Nintendo Switch and it's simply using the built-in record feature to take 20 to 30 second clips of gameplay and then stitching them back together in your video editor to create one seamless take.
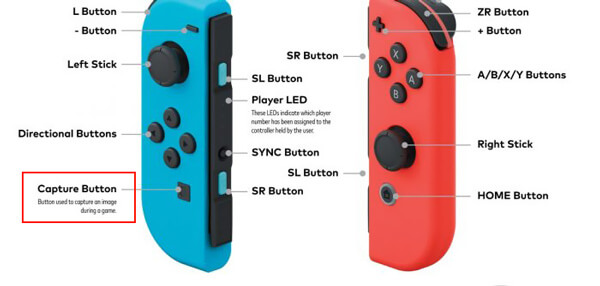
Step 1 You start by holding down the record button. This will create a 30 second video clip. You might want to do that for as many 20 to 30 second clips as you need to create your video.
Step 2 Then you'll go into your gallery and send over those video files to your phone or computer. And here you have your gameplay recorded.

One of the downfalls of this method to record Nintendo Switch gameplay is that you'll be stuck in a 1280×720p format. And you can't stream since it's lower quality and it could be a lot of work.
The benefit to recording your clips every 20 to 25 seconds is that the videos will only record the time from your last video recorded. So if you put these clips into a video editor back to back there will be a seamless transition and it won't look like you made this video out of several smaller clips.
Method 2. Use the capture card
Now here is the most practical method for a lot of you out there and the second method is going to be the best overall way to record footage on the Nintendo Switch by the way. The only cost to this method is the cost of the capture card.
Capture card is what every professional uses when they record footage. A capture card is basically the middleman between your console and your computer. So you need both your console whether that be a Switch, an Xbox, a PS5 or whatever you got and you need a computer. What the capture card does is it takes the footage from your console and it sends it to your computer. So that way you'll be able to pick up all of the footage directly from your console now.
But if you want to stream it to a TV or something that's not your computer monitor, then that's when you would take an HDMI cable and plug it from the HDMI out of the Elgato capture card and then you would plug that into a TV.
Step 1 Have the capture card plugged in. When you got your capture card you should have gotten some software. Open it and you can see that it recognizes our device and it's capturing your Switch.
Step 2 Grab your Switch controllers and you can see that you're moving around so now that you have your game captured and you can change the setting to 1080p to make it high definition. And you can also make it full screen.
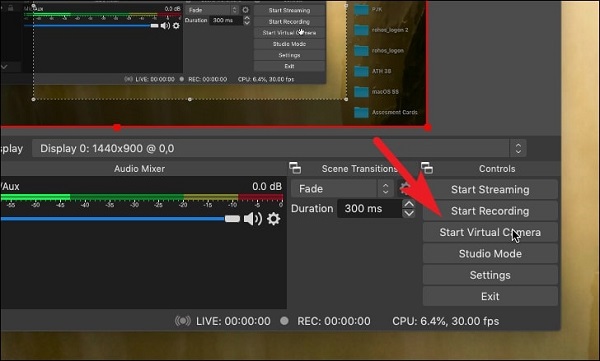
Step 3 If you just want the gaming footage, you could just record in the software. Hit the red record button in the bottom left corner. If you wanted to just stream like then you could just hit go ahead and go live and then start streaming.
Step 4 If you're done recording, you click the button again to stop the recording. And the footage is going to be on the drive. And if you want to change that, just hit browse and then pick the new folder that you want to save it.

Method 3. Use a screen recorder
However, capture cards could be pretty expensive if you want a good one. So if you don't want to spend that much money, we'd recommend a third-party screen recorder like Apeaksoft Screen Recorder. This is a professional tool to record and capture screen on your Windows or Mac and enables you to keep the original image/sound quality. With up to 60 fps frame rate, you can record any gameplay and then share with your fans or friends.
Step 1 Download and launch on your computer. Choose Game Recorder.

Step 2 Set the recording area, audio source, and other settings. After you're ready, just hit REC to start recording. And hit the pause or stop button when you're finished.

Part 3. FAQs about Recoding Switch Gameplay
How to transfer gameplay videos saved on Nintendo Switch?
From the home menu find the video in the album. Then select Send to Smartphone.
How to trim and edit video on the Switch?
Open the album and edit by selecting Sharing and Editing > Trim.
What are the benefits of recording Switch on PC?
Recording on PC when you have a powerful screen recorder could help you capture the frame for a longer length and with good quality.
Conclusion
So if you don't have high requirement of the recording time, you can use the default recorder in Switch to record Switch gameplay. But if you need to record a long gameplay on Nintendo Switch, you'd better try a capture card or a third-party screen recorder like Apeaksoft. We hope this article can help you save some time and thanks for reading!


