Some people may like update or restore their iPhone through iTunes, which can resolve a variety of issues. However, sometimes you might find error 9, 4005,4013 or other iTunes restore errors when you try to restore your devices with iTunes. Unfortunately you may have been forced to do some research or even begin to understand why you're getting the error, which can waste a lot of your time. In this tutorial, it will provide more about some of the most common iTunes restore errors and how to fix them so you don't have to spend hours researching for solutions by yourself.

Part 1: Best Way to Fix iTunes Restore Errors
It can make people crazy when they encounter iTunes restore errors. To fix this issue, the iOS System Recovery may be the best choice for you. It's an ultimate guide on how to fix your iOS system back to normal in various issues from iPhone, iPad and iPod. This is what this software can do.
- Work for all iOS Devices like iPhone 16/15/14/13/12/11/X, iPad Pro/Air/mini, iPod and more.
- Fix iPhone, iPad and iPod from DFU mode, recovery mode, Apple logo, headphone mode, black screen, etc. to normal.
- It is an easy iOS System Recovery which offers you a safe way to repair your system problem at home without data loss.
The program has a clean user interface and is very easy to use. It also contains help documentation. It may be the best iOS recovery software for iTunes restore errors. Just learn more details about the specific steps.
Free Download Free DownloadHow to Get Rid of iTunes Restore Errors
Step 1. Download and install the PC or Mac version of Apeaksoft iPhone Data Recovery from the official website through your browser. And then you can click the "More Tools" to access to the "iOS System Recovery" mode.
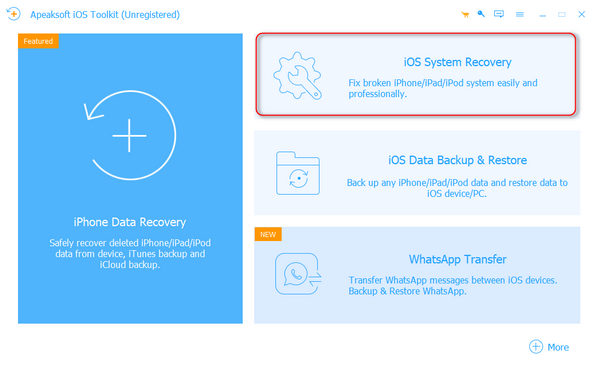
Step 2. Launch iOS System Recovery and connect your iPhone/iPad/iPod with a USB cable. (iPhone is not showing on computer?)
Once detected, you can see the current device name and OS version displayed on the interface of the program.
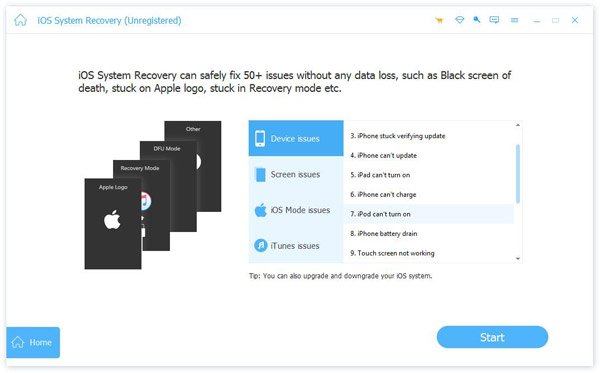
Step 3. Click "Question" button and follow the guide to turn your iPhone into Recovery or DFU mode. Here we put disabled iPhone into DFU mode to fix iTunes restore errors.
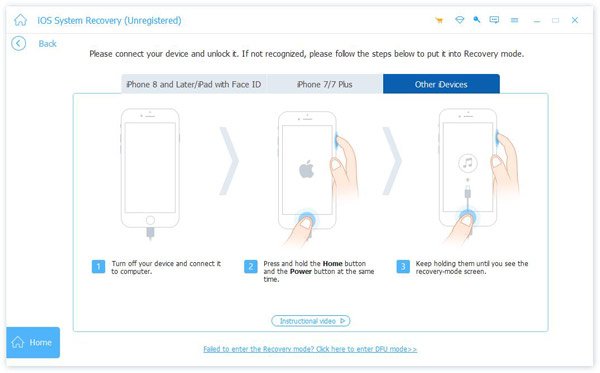
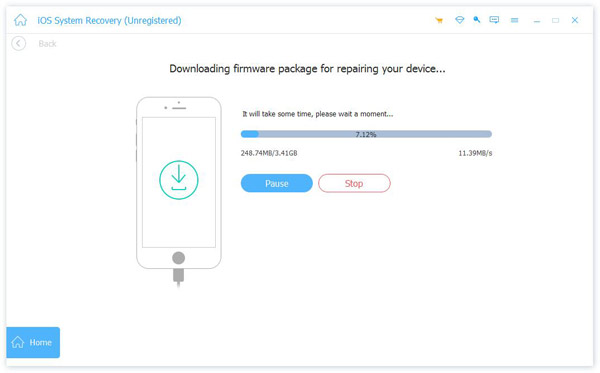
Step 4. Choose the right iPhone model and then download the repaired device plug-in by clicking "Download". When the plug-in download is finished, this software can automatically fix disabled iTunes restore errors and bring it back to normal.
Part 2: Common Ways to Fix iTunes Restore Errors
Generally speaking, the iTunes restore errors won't always happen when restoring a device with iTunes, and hopefully it never will happen. Unfortunately, sometimes things happen, those issues with restoring your devices seem to pop up without notice.
Apart from the alternative solutions to access iTunes backup with iPhone backup extractor software, here are some of common methods that you should try to solve this problem.
1. Make sure the iTunes is up to date to prevent iTunes restore errors
Sometimes iTunes restore errors come from problems related to iTunes or your iOS version itself. If you're running an outdated version of iTunes, it's possible that it doesn't support your iOS version. Moreover, if you're using a beta version of iOS, then iTunes might not be able to restore to a public release of iOS. You can update the iTunes by the follow steps.
Step 1. Open iTunes, Click on "Help" at the top of the window, then select "Check for Updates".
Step 2. Follow the instruction to install the latest version of iTunes.
iTunes update enables you to fix the issue that iPhone cannot restore from iTunes.

2. Reconnect your network when you run into iTunes restore errors
If you find a network failure by opening the browser and can't open any website. It will result in some unknown issue when you are just restoring your iPhone through iTunes. This is the most common issue for iTunes restore, especailly when you want to restore iTunes purchases. It's possible that your internet connection may stop working correctly during the restore process. There are two things you can do to recover your network.
Step 1. Check whether the wireless router is working normally and that no cables have become unplugged.
Step 2. Reboot your router, also your computer and restart your restore option.
3. Check Apple's servers when you have iTunes restore errors
Sometimes Apple's servers go down for maintenance or because of an issue. You can check Apple's system status webpage at any time to make sure that everything's up and running. If something goes down while you're trying to restore, then you may experience an error restoring your devices with iTunes.
When you find your iTunes is slow, you can also check the solutions to fix it.
4. Choose the firmware suit your device in case unknown iTunes restore errors
If you downloaded the wrong firmware for your device, the iTunes restore process will be unable to complete. You cannot try to install a GSM firmware on a CDMA iPhone. When you are downloading some specific iOS firmware files instead of letting iTunes download them on its own, it will be more likely to have iTunes restore errors. Here is the specific steps you can follow to resolve this issue.
Step 1. Open the iTunes and check the firmware type by connecting your iPhone with your computer.
Step 2. Choose the right iPhone model and then download the correct firmware by clicking "Download".
5. Close the interfering software if encounter iTunes restore errors
If you have software that is keeping certain USB ports from functioning, or software that is interfering with iTunes trying to communicate with Apple's restore server, then iTunes will get cranky and throw restore errors that will make you have a bad day. Make sure you don't have any software settings set, such as a modified hosts file, which could be interfering with iTunes' functionality.
If the above solutions are still no-working, just try to reset iTunes to make it back to a starting point.
Conclusion:
Hopefully one of the above methods has helped you to get around those iTunes restore errors that iTunes can sometimes throw at you. If you still cannot restore to factory settings, we would recommend you to contact Apple technical supporter for further information. You might even try contact Apple's new Twitter support account! If you would like to suggest any additions or updates to this page, please let us know.

