Have you ever encountered the situation that your iPhone or iPad won't turn on normally? To be honest, such a condition may happen to everyone, and is easy to fix, which means that it is not so troublesome as you thought.

"My iPhone won't turn on" does not mean you have to buy a new one. There are lots of solutions to fix the problem. And this passage is going to show you a comprehensive instruction about how to fix this problem.
- Part 1: Charge Your iPhone/iPad
- Part 2: Hard Reset Your iPhone/iPad
- Part 3: Restore iPhone to Factory Settings
- Part 4: Put iPhone into DFU Mode
- Part 5: Try FoneLab iOS System Recovery
Part 1: Charge iOS Device to Fix iPhone/iPad Won't Turn On
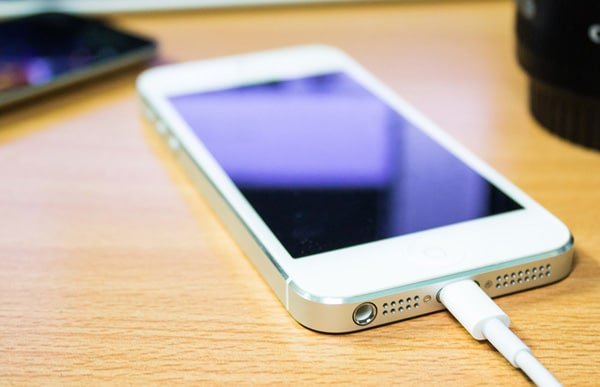
Actually most of the case that iPhone/iPad won't turn on is caused by the battery has ran out, which is often ignored by a lot of users. So, the first step you need to do is to charge your iPhone or iPad when you find the iOS device screen has been black for a long time. Jus plug your iPhone or iPad into the wall charger and let it charge for at least 20 minutes, the device will turn on automatically.
However, if the iPhone still won't turn on after a long-time charge, chances are that the USB cable or your charger is faulty. Tyr to charge your iPhone again with another data cable or use another adapter.
Besides, if your iPhone won't turn on but can be charging, it is possible a problem of the charging post. Clean the charging post with a linen cloth and check whether it is damaged. Then charge your iPhone for another time.
Part 2: Hard Reset Your iPhone/iPad
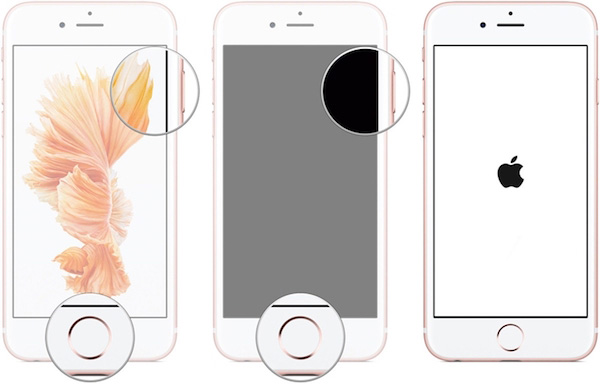
If charging the iOS device does not work, you can consider some added measures to fix the iPhone/iPad won't turn on problem. and hard reset can clear more memory of the device, and forcibly restart your iOS device. Here are the detailed steps to perform hard reset on your iPhone/iPad:
Step 1. Press and hold Power button and Home Lock at the same time if you have iPhone 6 and older generations. Or hold down the Volume Down button instead of the Home Lock if you are using iPhone 7 series.
Step 2. To fix iPhone won't turn on issue, then keep pressing these two buttons for more than 10 seconds to turn the screen black.
Step 3. When you see the shut-down slider shows up on the screen, continue holding the buttons.
Step 4. Release these two buttons when the big white Apple icon appears on the screen, and your iPhone will start up.
Part 3: Restore iPhone to Factory Settings
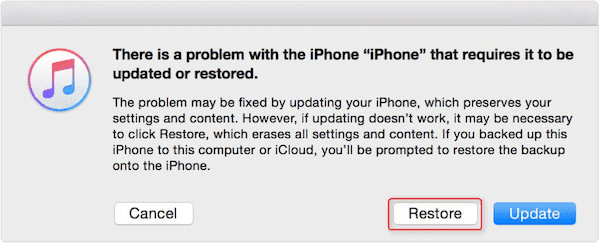
Normally the methods mentioned above can help you fix the iPhone/iPad won't turn on issue. In case both these two solution are out of operation, you can try to restore your iPhone to factory settings. One thing to illustrate, these features can solve a lot of problem efficiently. It will remove all the data and contents on your device. So, before you start restoring your iPhone to factory settings, make sure you have back up and sync the data first. And then follow the steps below to fix iPhone/iPad won't turn on:
Step 1. Connect your iPhone or iPad with the Dock Connector port via a USB cable. But do not plug the USB cable into your computer.
Step 2. Press on the Home Lock button on the iPhone. If you are using iPhone 7, hold down Volume Down button instead.
Step 3. Keep holding the Home button or Volume Down button, then plug the other end of the USB cable into your computer.
Step 4. Launch iTunes to put your iPhone into recovery mode, and then you can restore the iPhone completely.
This solution will help you exactly when your iPhone is in DFU mode, disabled, frozen, etc.
Part 4: Put iPhone into DFU Mode
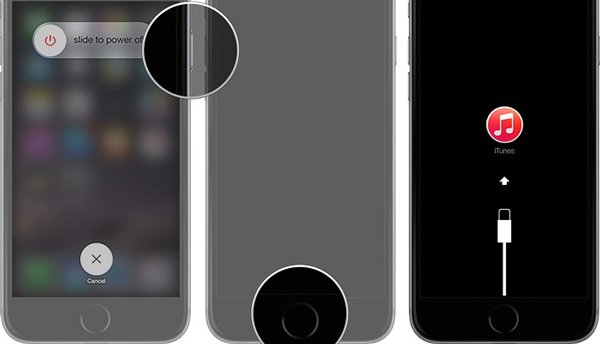
If you find that your iPhone won't either turn on or boot up, especially when your device is jailbreak or fails to updates without enough battery, you can put the iPhone into DFU mode to fix it. Same to the factory settings, DFU mode may also erase the data and settings on your device, so ensure you have restored the iPhone to iTunes or iCloud beforehand. Now, let's go to learn how to put your iPhone into DFU mode:
Step 1. In order to solve iPhone won't turn on problem. First connect your iPhone into the computer by a data cable.
Step 2. Hold down the Power button for at least 3 seconds, and release it.
Step 3. Press on the Power button as well as Home (on the iPhone 7, volume down button instead) together for around 10 seconds.
Step 4. Let go of the Power button, but continue holding the Home Lock or volume down button for about 5 seconds.
Step 5. Once the screen stays black and nothing shows up, you are in DFU mode already. Then follow the onscreen instructions in iTunes.
Part 5: Try FoneLab iOS System Recovery
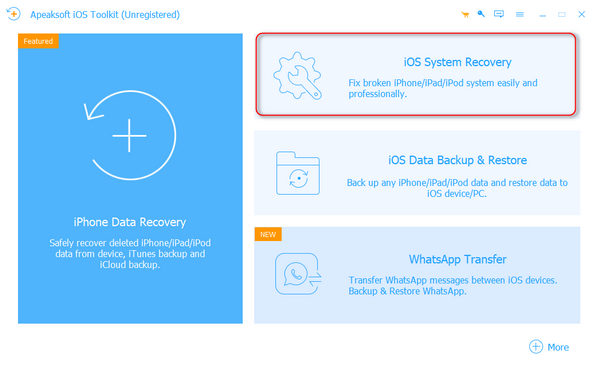
If you are looking for a solution to help you solve the iPhone won't turn on issue efficiently and conveniently, iOS System Recovery should be your best choice. This professional iOS system recovery offers a safe and secure solutions to help you fix multiple iPhone/iPad problem, including blue screen of death, system loop, reboot loop as well as iPhone won't turn on, etc. More importantly, iOS System Recovery will never lose the data and settings on your device, and you do not worry it will leak your privacy either. Here are the step-by-step guides:
Step 1. Plug device into computer
After downloading iOS System Recovery on your computer, launch it. Then connect your iOS device to the software via a USB cable.
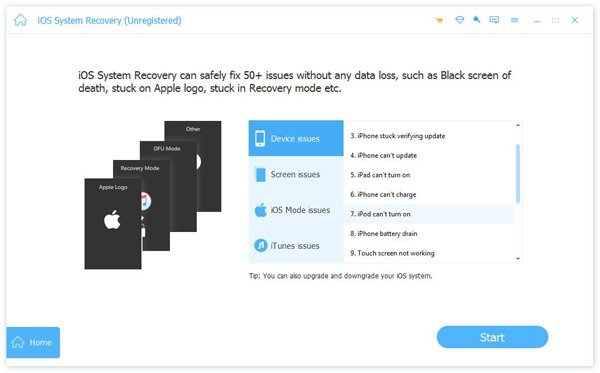
Step 2. Put into DFU mode
Once connected successfully, this program will start detecting your iPhone. Then follow the onscreen instructions to put the device into DFU mode.
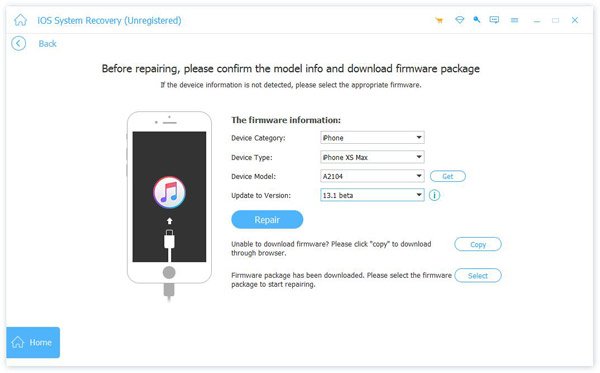
Step 3. Download a firmware
Check the detailed information about the detected device, and hit on the Download button to get the matching firmware package to fix iPhone won't turn on issue.
Step 4. Start repairing process
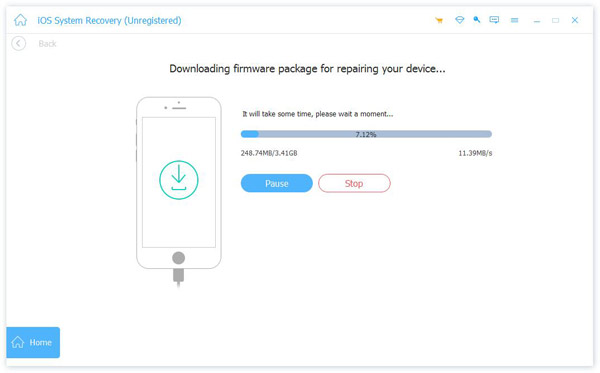
When the firmware is downloaded, iOS System Recovery will fix your iPhone/iPad won't turn on issue automatically. Do not disconnect the device during repairing.
You may also want to know:
How to check and fix water damaged iPhone
How to recover data from water-damaged iPhone
Conclusion:
If your iPhone won't turn on, you should know the methods to fix the problem. The article explains different solutions. When the above solutions do not work, you can also contact Apple to fix the problem accordingly.

