How can you make an image bigger while not losing its original quality or making it blurry? This can be a hard question, especially for an amateur who has never dealt with resizing an image. No need to panic if you’re a newbie in enlarging images. Just read through this post and you will learn 4 methods on how to enlarge an image without losing quality. Then, you can easily make an image bigger for print in good quality or make a clear large poster out of a small source picture. Simply scroll down and see more.

- Part 1: How to Enlarge Image without Losing Quality Online
- Part 2: Professional Way to Make an Image Bigger
- Part 3: FAQs about Make an Image Bigger
Part 1: How to Enlarge Image without Losing Quality Online
The easiest way to make an image bigger is using online image tools. In this way, you do not need to install any applications on your device, and in the following content, you will see 3 efficient methods that can enlarge images without losing quality with the step-by-step guide on how to achieve this.
Free Image Upscaler
Apeaksoft Free Image Upscaler is a free online image upscaler. When using this upscaler to make an image bigger, it also works as an image optimizer and enhances your image quality automatically. The image compatibility issue is also perfectly solved in this online tool and many image formats are acceptable such as JPG, PNG, and BMP. Most importantly, there is no limitation on the picture numbers you upload per day, but the size limit per picture is 10MB.
- Enlarge your image with several magnification options.
- Enhance picture quality when resizing it online.
- Make your image bigger without quality loss.
- Fix picture problems like noise, blur, and low resolution.
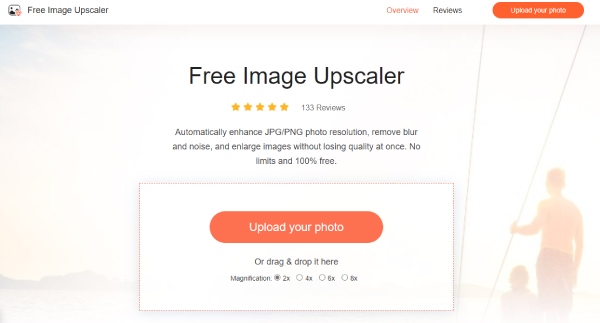
Step 1 Go to the website of Free Image Upscaler on any of your browsers. In the center of your webpage, click the Upload Your Photo button and select one from your device. You may also click on the magnification options below to decide how much you want to enlarge.
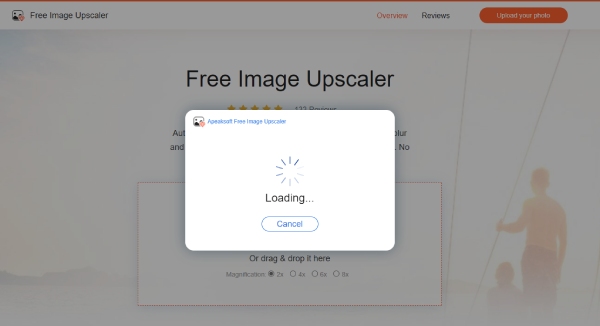
Step 2 After selecting your picture, it will start loading. Once the loading finishes, your picture will be enlarged automatically as well as the resolution. And you will see the original size on the left corner while the output size on the right corner.
Step 3If you find the result satisfying, you can click the Save button to export the final picture to your device. If not, you may click the magnification option above the picture to enlarge it again before exporting.
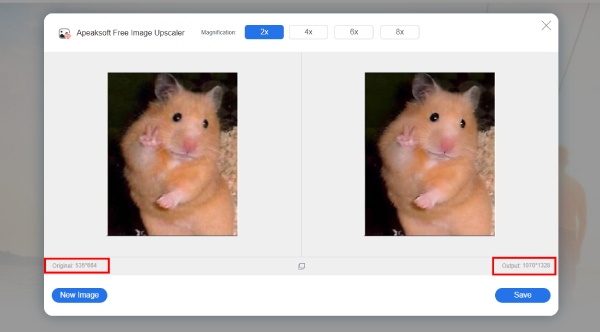
Image Resizer – Image Enlarger
Image Resizer deals with everything about images ranging from compressing images to resizing them. You can make an image bigger in seconds and customize the output size freely as you want. Besides, except for enlarging only one image, you can also change sizes for a bunch of pictures through the Bulk Image Resizer and select images from a local device, Dropbox, or URL. See the steps below and enlarge your image to the exact pixel size.
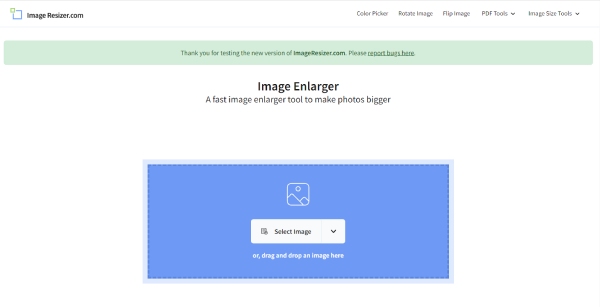
Step 1 Open your browser and go to the Image Resizer official website. Scroll down to the very bottom of the web page.
Step 2Click the Image Enlarger button or the Bulk Image Enlarger button depending on how many pics you want to make bigger.
Step 3You can either make the image bigger by dimensions or by percentage. If you choose by dimensions, then enter the expected width and height there.
Step 4Last, click the Enlarge Image button and your browser will automatically download it to the default folder.
Adobe Express -Resize Image
Adobe Express is a comprehensive toolkit with practical photo resize that can enlarge your image without losing quality online for free. You can change the size of an image easily whether you want to enlarge or downsize a picture. There are even more features on this omnipotent online toolkit like apply filters, crop images, etc. More importantly, no watermark for your enlarged image after exporting. You need to sign in to export your work and access more features.

Step 1 Go to the official website of Adobe Express and click the Resize Image button from the Features option on the menu bar.
Step 2 You will be on a new page, then click the Upload Your Photo button and the Browse on Your Device button. Select one image from your device.
Step 3 There are many size presets designed for various social media like Instagram, YouTube, etc. Choose the one you want or click the Custom button from the dropdown menu.
Step 4 Once done, click the Download button to save the enlarged picture to your device.
Part 2: Professional Way to Make an Image Bigger
Photoshop is undoubtedly the most professional way to make an image bigger while retaining the original quality of your image. This sophisticated program will take care of all the details in your picture while enlarging its size. Although it is pricy to access the full functionality of Photoshop, you can get the best help in enlarging images and making an image high resolution there. Here is a quick tutorial to help you better make an image bigger in Photoshop.
How to Make an Image Bigger in Photoshop
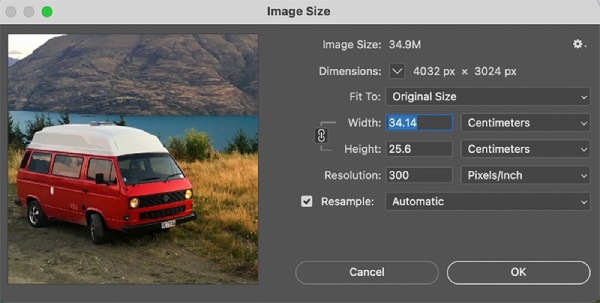
Step 1 Open Photoshop on your computer and click the File button and then the Open button to select an image.
Step 2 Next, click the Image button above. Then, click the Image Size button there. A preview window will appear, and you can change the size there.
Step 3 Enter you desired dimensions of the image in that window to make your image bigger. Afterward, click the Resample dropdown button and choose Preserve Detail.
Step 4 Finally, you can click the Export button from the File dropdown button to save the image.
Note: If you cannot find the Preserve Detail function when enlarging your image, you can click the Preferences button and check if the Preserve Detail is enabled or not in Technology Previews.
Part 3: FAQs about Make an Image Bigger
How can I make an image bigger on Android/iOS?
The online methods above are also workable on your mobile phone. Free Image Upscaler and Adobe Express are both accessible on mobile phone browsers. You can follow the steps in the post and enlarge your images.
Will the file size change after making an image bigger?
Normally, yes. If you make an image bigger, then the usual practice is to add pixels to it. Therefore, to store more pixels, the file size gets bigger as well. If you want to maintain the file size under a certain range, you can use Photoshop to deal with it professionally.
How can I make an image bigger on Mac without extra apps?
The pre-installed Preview app on Mac can help you. This built-in application can be a viewer and image size changer at the same time. Open a photo via Preview and click the Tools button on the menu bar. Then click the Adjust Size button to make it bigger.
Conclusion
Once you’ve learned the methods above of how to enlarge images without losing quality, you can now easily make your small pictures bigger and print them out. Just keep in mind how big you want to enlarge the image and pick a suitable way now. Whether it is the quickest one or the professional one, you can benefit from all methods.


