The cassette tape was a dominant music format through most of your childhood. However, audiocassettes have been weeded out now and many classical music files will be sealed in the old and little cassette box.

What a pity it is! So is there any feasible way to help you transfer these cherish memory to digital audio files that will live forever? The answer is yes!
This passage is exactly focusing on discuss how to convert your cassette to MP3 format on computer. Moreover, you can also learn more details information about the cassette to MP3 converting. If you are interested with this topic, read on and learn the step-by-step instruction to bring your tapes into digital age.
- Part 1: Prepare to record cassette to MP3 on computer
- Part 2: How to convert cassette to MP3 with Apeaksoft screen recorder
- Part 3: Question and answers for converting cassette to MP3
Part 1: Prepare to record cassette to MP3 on computer
Before you start to record cassette to MP3, what you need is to make an adequate preparation beforehand.
Because the transferring process is a little bit complex, you have to gather enough materials:
(1): A cassette deck and a computer are indispensable.
(2): A cable to connect your cassette deck to the line input on your computer. The particular bits depend mainly on your cassette desk.
Then prepare to convert cassette to MP3 on computer:
Step 1: Connect cassette to the headphone jack
Use the cable to get a connection between the headphone jack in your cassette deck and the liner input on computer.
Step 2: Plug into the line output jacks
Next inset the red and white RCA plugs to the corresponding jacks on the cassette deck, and plug the other end of the cable into the line in jack on the computer.
Make sure the cable is plugged completely and safely. If not, the music converted from cassette to computer will be unclear.
Step 3: Connect balanced line outputs
Then connect the XLR into the left and right outputs, and the other end to the sound input in computer. To prevent your sound card from destroying, do not connect your speaker outputs to any input of your sound card.
Step 4: Check the sound input level
In order to transfer cassette to computer in a high quality, you have to confirm the input sound is in a proper level, neither too quite, nor too loud.
Step 5: Set your input and adjust levels
Launch the Sound Control Panel on PC, set the input volume control to around 75%, and the headphone output of your cassette deck to 0, which will offers the cleanest signal overall.
Extended Reading: Best MP3 Voice Recorders in 2025.
Part 2: How to convert cassette to MP3 with Apeaksoft Screen Recorder
Now it is time for you to transfer your cassette to MP3. and here, you are recommended to use Apeaksoft Screen Recorder to achieve your goals. Apeaksoft Screen Recorder should be the best screen recorder to record your cassette easily in a professional way. With this wonderful cassette to mp3 converter, you are able to get back all your precious memory. To sum up, this recording tool will give you the greatest experience!
Follow the steps below to learn how to convert cassette to MP3 on computer with Apeaksoft Screen Recorder
Step 1: Download and install Apeaksoft Screen Recorder
Free download this cassette to MP3 recorder with the download button above, and then install and run it to your computer. Tap on its icon to launch this software.

Step 2: Make recording settings
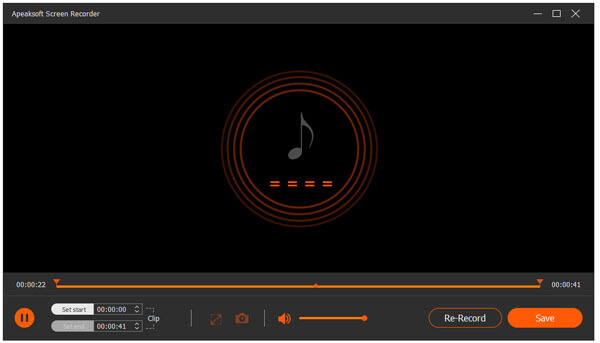
Choose the "Audio Recorder" option in the main screen, turn on "System Audio", and then turn off "Microphone". you can also adjust the recording volume as you like.

Step 3: Record cassette to computer
Hit the REC button on Apeaksoft Screen Recorder, and press Play button on the cassette deck. To finish the recording, just press down the Stop button on Apeaksoft together with your cassette desk.

Step 4: Pre-listen and edit the audio
After the recording is done, you are able to perform many professional mastering functions to edit the audio file. Then you can share it on Facebook or other social website.

Part 3: Question and answers for converting cassette to MP3
Q: There seem to be only a headphone port on my MacBook, and no CD drives, either. However, most of the USB cassette gizmos require multiple of headphone ports and software on CD. So is it possible for me to transfer cassette to MP3?
A: There used to be a combination audio port on some MacBook models where you can switch in settings to accept sound input. But it is not available on all Apple hardware. You are able to buy a cheap adapter that links a standard audio cable from the cassette player to the Mac’s USB jack.
Or you can invest in a dedicated USB-to-MP3 cassette converter to convert tape to computer, which is paid for around $25. It is a little bit expensive, but also the easiest solution.
When it comes with the CD drive demand, maybe you can check the system requirement and try to download a free Audacity audio-editing program. This app enables you to skip the installation from a disc.
Q: The storage space of my Android tablet is almost full, I wonder if there is enough space for me to import the MP3 files converted from my old cassette. So how can I access the detail info about my device’s memory space?
A: Go to Settings app, swipe down the page and tap on the Quick Settings box. Hit on the top bar, and click the cog-shaped icon to view the storage space of your Android tablet as well as what types of data are taking it up.
Conclusion
To see how much total memory space your device has left, and a certain type of files are eating up that space, navigate to the Device area, choose Storage option, and tap on a category to check it.


