Skype allows users to make free voice and video calls all over the World. You can also share photos, messages, emoticons and other files in real-time by using Skype. Sadly, you may have to uninstall Skype on Mac due to the incompatibility, quit unexpectedly error and other issues.
It is true that you can drag and drop Skype app to the Trash. But if you want to uninstall Skype on Mac completely or you encounter the Skype won’t uninstall problem, you need to follow solutions. This article works for all Mac operating systems including macOS Sequoia, Sonoma, Ventura, Monterey, Big Sur, etc.

- Part 1: How to Uninstall Skype on Mac with Ease
- Part 2: How to Manually Uninstall Skype on Mac
- Part 3: How to Uninstall Skype for Business on Mac
Part 1. How to Uninstall Skype on Mac with Ease
Apeaksoft Mac Cleaner can uninstall any app on your Mac entirely. Compared with the traditional app uninstallation, you can delete related files and history within few clicks. In another word, you can save time on taking extra steps to uninstall Skype for Mac. By the way, you can free up more storage space on Mac. The Mac Cleaner can scan all your unwanted files or apps thoroughly. You can follow the list to delete or uninstall app on Mac effortlessly.
- Uninstall Skype and other third-party apps on Mac completely in bulk.
- Speed up Mac, remove junk files and empty trash on Mac with easy process.
- Find and delete duplicate files or folders on Mac.
- Monitor hardware health including disk utilization, memory usage, battery status and CPU usage.
- Search for files by name, size, time and other factors from the scanned result.
How to Completely Uninstall Skype and Delete Associated Files on Mac
Step 1. Launch Skype uninstalling tool
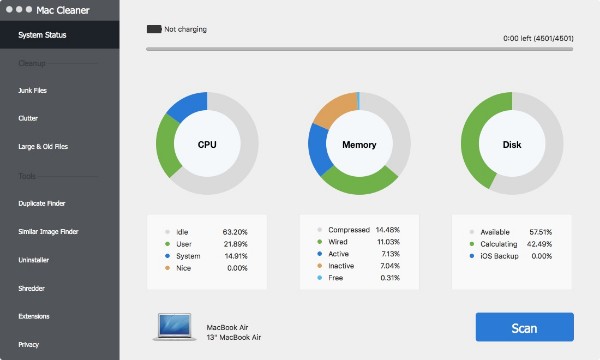
Free download and install Skype Uninstaller on your Mac computer. You will be in the default “System Status” page. Here you can check CPU, memory and disk status by percentage. Well, you can also click its icon on the top menu bar of Mac screen to have a check.
Step 2. Scan installed apps on Mac
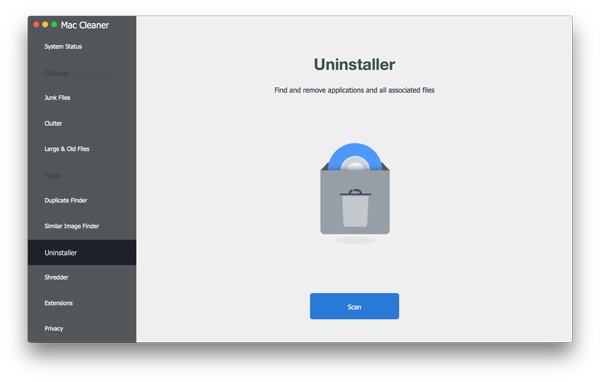
Choose “Uninstaller” in the left panel under the “Tools” category. Click “Scan” at the bottom of Mac Cleaner. Wait for a while to complete the process. If you are not satisfied with the scanning result, you can click “Rescan” near the lower right corner to have a second try.
Step 3. Choose Skype app from the program
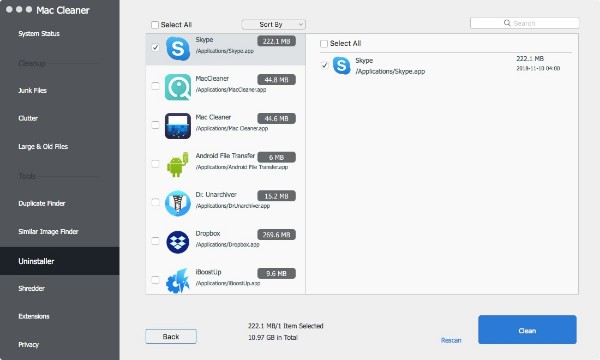
Scroll down and select “Skype” from the list. You can also use the “Search” engine to find Skype among all scanned apps quickly. In the right panel, all Skype files will be displayed in categories. The longer time you have used Skype, the more files and folders about Skype you can see.
In this way, you can easily uninstall Office, Safari, Viber, etc., from Mac.
Step 4. Uninstall Skype on Mac completely
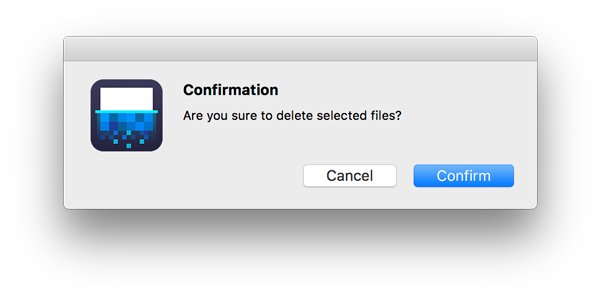
Mark before items you want to delete. Then click “Clean” on the lower right corner of the window. A notification pops up with the following messages: “Are you sure to delete selected files?” Click “Confirm” to move on. Consequently, the program can uninstall Skype on Mac OS X/11 in seconds.
Part 2. How to Manually Uninstall Skype on Mac
Dragging and dropping Skype to the Trash is not correct way to uninstall Skype on Mac entirely. You can still see Skype files in your Mac hard drive. Well, calm down and take it easy. You can uninstall Skype app and remove it from your Mac computer by yourself too. Be aware that you need to spend much more time on this solution.
Step 1. Quit Skype on Mac
Find the Skype icon on the top. Choose “Quit Skype” from the Skype drop-down menu. You can also right click Skype on the Dock. Then select “Quit” to stop running Skype app. If Skype for Mac fails to quit, you can use Activity Manager to force quit Skype.
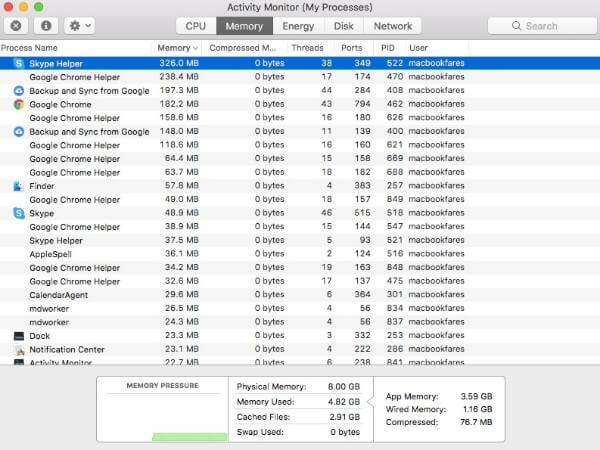
Step 2. Remove Skype install package
Open Finder and locate the “Applications” folder. You can also select “Applications” from the “Go” submenu. Hold and drag Skype to the Trash. It is a way to delete the Skype messages and other files, but there are still some other cache files if you want to uninstall the program.
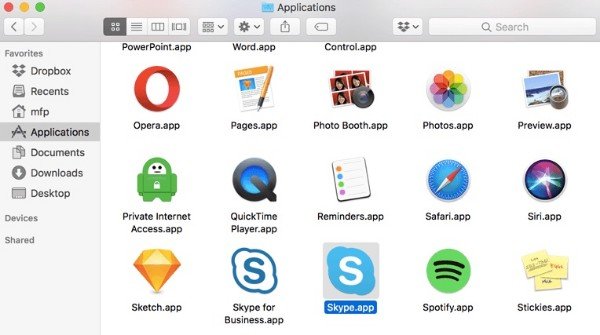
Step 3. Uninstall Skype on Mac entirely
Choose “Go to Folder…” from the Finder “Go” drop-down list. Enter “~/Library/” in the blank box. Then press “Enter” on your keyboard. When you locate the Library folder, choose “Application Support” from various folders.
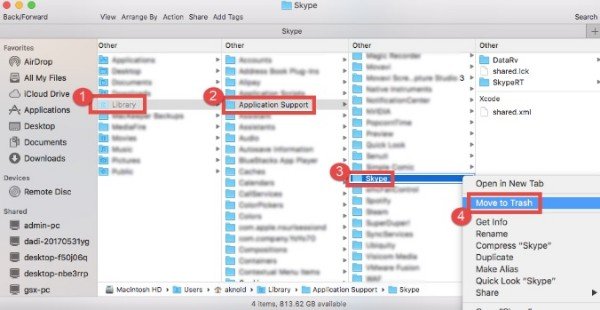
You may want to know: How to delete Skype contacts from Skype for business?
Part 3. How to Uninstall Skype for Business on Mac
Just as its name shows, Skype for Business is the business-oriented Skype version. You can make Skype calls with colleagues with the separate work contacts easily. However, it is kind of different to uninstall Skype for Business on Mac.
Step 1. Quit Skype for Business
Choose “Force Quit…” from the Apple drop-down menu on the top left corner. Select “Skype for Business” and click “Force Quit” to confirm.
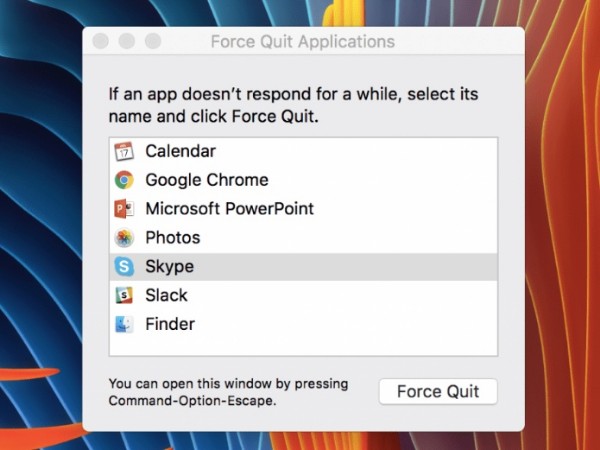
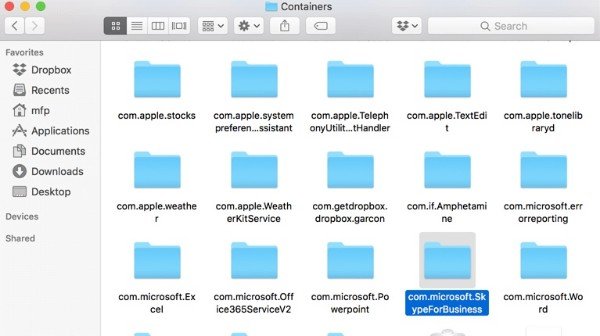
Step 2. Open the Containers folder
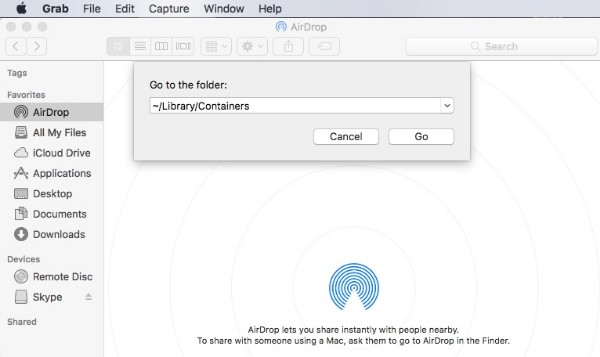
Open Finder App. Choose “Applications” in the left panel. Drag and drop the Skype for Business to the Trash. Then press “Shift”, “Command” and “G” keys together to access the “Go to Folder…” dialog. Enter “~/Library/Containers/” and hit the “Enter” key.
Step 3. Uninstall Skype for Business on Mac completely
- 1. Find and delete the “com.microsoft.SkypeForBusiness” file in the “Containers” folder.
- 2. Delete “com.microsoft.SkypeForBusiness.savedState” from the “Saved Application Stata” folder.
- 3. Remove “com.microsoft.SkypeForBusiness.plist” from the “Preferences” folder.
- 4. Open the “Internet Plug-Ins” folder inside “Library”. Right click on “MeetingJoinPlugin.plugin” and choose “Move to Trash”.
- 5. Empty the Trash and restart your computer.
Check details in this guide if you want to delete your Skype account.
Conclusion
You can completely uninstall Skype on Mac manually or quickly via an app uninstaller. Though the traditional Skype uninstallation takes more time. If you want to do a clean Skype uninstallation in a short time, Mac Cleaner can be your better choice. If you have any query about uninstall Skype on Mac, you can share more detailed information in the comments.

