iTunes works on not only Mac but also Windows computers. Once you have at least one Apple product, you can use iTunes to back up, transfer or manage files for free. However, there are many negative reviews and limitations about iTunes. Many users even want to uninstall iTunes and use better iTunes alternatives.
If you are disappointed with iTunes, you can follow this tutorial to uninstall iTunes on Windows or Mac. For Mac users, uninstalling iTunes is a little tricky. Because iTunes is the default Apple app. Apple prohibits any removal of preinstalled applications. Nevertheless, you can still uninstall iTunes on Mac safely here.

- Part 1: How to Uninstall iTunes on Windows 7/8/10 PC
- Part 2: 3 Ways to Uninstall iTunes on Mac OS X/11 High Sierra/Mojave
- Part 3: Easiest Way to Delete iTunes Backups and Other Unneeded Files on Mac
Part 1: How to Uninstall iTunes on Windows 7/8/10 PC
You may want to uninstall and reinstall iTunes, or you just want to stop using iTunes. No matter which reason you have, you can get the correct steps to uninstall iTunes from Microsoft Store.
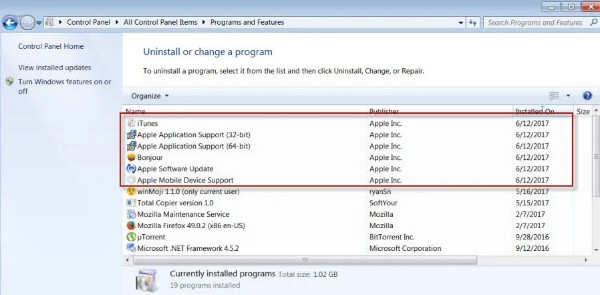
Generally speaking, you need to delete iTunes, Apple Software Update, Apple Mobile Device Support, Bonjour, Apple Application Support 32-bit and Apple Application Support 64-bit in order.
Yes, some Windows operating systems have two iTunes versions. You need to remove both of them and delete all related components to uninstall iTunes on PC completely.
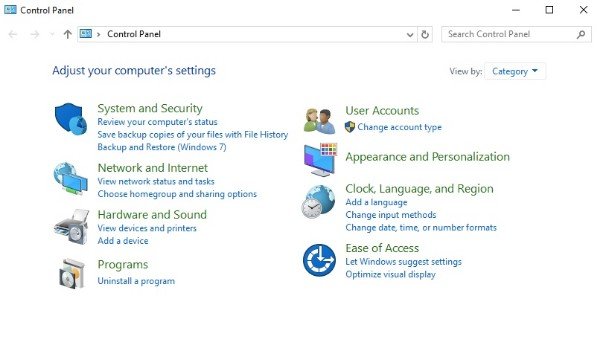
Step 1. Run Control Panel on Windows
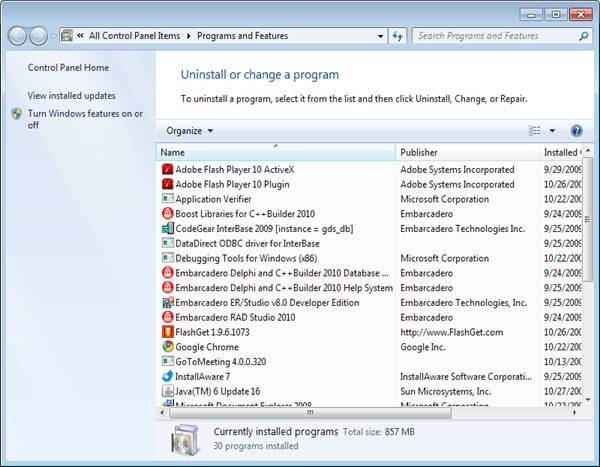
Open the “Start” menu. Search and find the “Control Panel” app. Click “Uninstall a program” under “Programs”. For Windows 7 and Windows 8 users, you need to choose this option under “Programs and Features”.
Step 2. Choose iTunes to uninstall
Click the “Publisher” option. Consequently, all Windows programs will display alphabetically by publisher. You can see “Apple Inc.” in the first place. Then select “iTunes” from the list.
Step 3. Uninstall iTunes on Windows 10/8/7
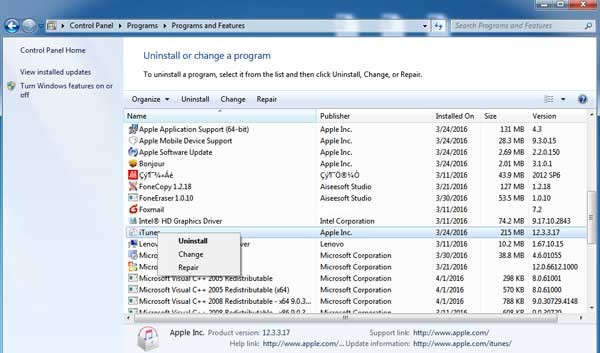
Choose “Uninstall” on the top menu bar. You can also choose “Uninstall” from the iTunes right-click menu. You will be notified with “Are you sure you want to uninstall iTunes?”. Click “OK” to confirm the iTunes uninstallation.
Step 4. Remove other Apple services related to iTunes
If you are prompted to restart the computer, choose “Restart later”. To get rid of iTunes permanently, you need to uninstall Apple Software Update, Apple Mobile Device Support, Bonjour, Apple Application Support 32-bit and Apple Application Support 64-bit too. After all deletions, you can restart your computer to have a check.
Part 2: 3 Ways to Uninstall iTunes on macOS 11, macOS X High Sierra
If you try to move iTunes to the Trash, you will be notified with “’iTunes.app’ can’t be modified or deleted because it’s required by macOS.”. You have to click “OK” but nothing else to give up. But don’t worry about that. You can still uninstall iTunes 12/11 from Mac by the following steps.
Way 1: How to Uninstall iTunes on Mac with Terminal
Step 1. Open Terminal on Mac
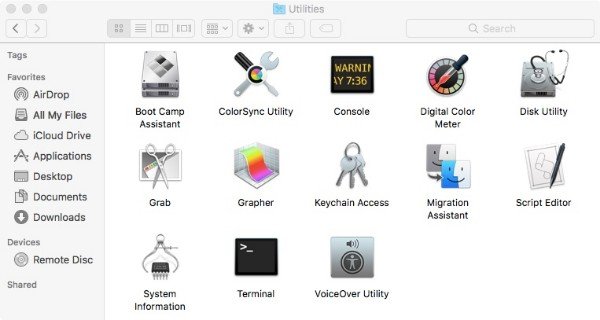
Power on your Mac computer. Run Finder App. Choose “Utilities” from the “Go” drop-down menu on the top. In the Utilities folder, choose the “Terminal” option. Well, you can also access Terminal by using the Apple Spotlight feature.
Step 2. Uninstall iTunes on Mac High Sierra or Mojave
In the Terminal window, type “cstutil disable” and press the “Return” key on your keyboard. It can disable Apple System Integrity Protection. If you have the administrator rights, you can restart Mac and sign into your admin account.
Later, enter the command “cd/Applications/” and press the “Return” key. You can see the application directory.
After that, copy and paste the command “sudo rm –rf iTunes.app/” to uninstall iTunes on Mac via Terminal.

Note: If you uninstall iTunes with Terminal, Mac will not ask for the confirmation. What’s more, you need to enter “csrutil enable” to enable Apple System Integrity Protection again after iTunes deletion. Here you may also want to know how to reset iTunes.
Way 2: How to Uninstall iTunes on Mac with Apple’s Permission
Step 1. Get iTunes info
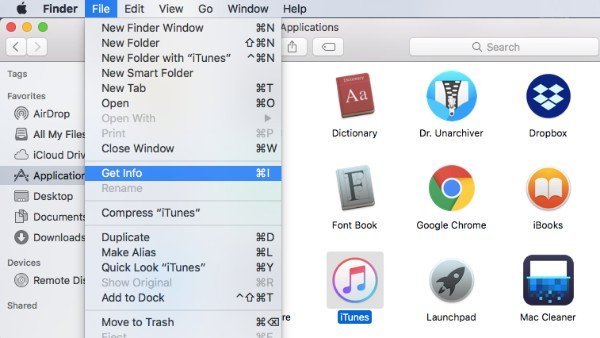
Quit iTunes first. Choose “Go” on the top menu bar of “Finder”. Select “Applications” from the list. Find and click “iTunes.app”. Then choose “Get Info” from the “File” top drop-down menu.
Step 2. Ask for iTunes permissions
Double click “Sharing & Permissions” near the bottom of “iTunes Info” page. There is a small padlock button on the lower right corner. Type your administrator password, then choose “OK” to unlock iTunes Sharing & Permissions menu.
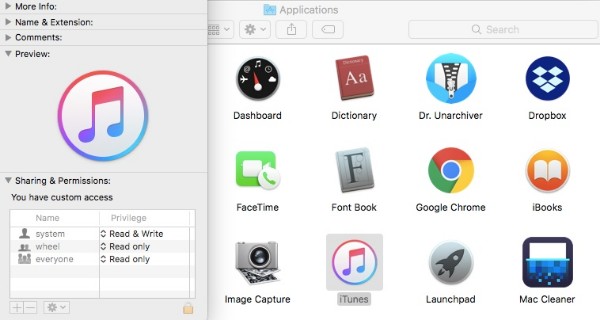
Step 3. Ask for permission to uninstall iTunes
Now you can change the “Privilege” of “everyone” from “Read only” to “Read & Write”. Through this operation, you get the right to uninstall iTunes from a Mac. Do not forget to click the padlock button to save your change.
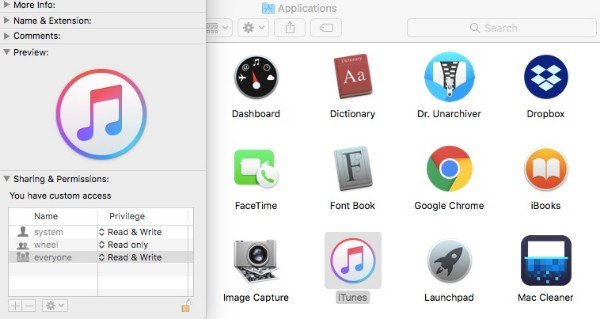
Step 4. Uninstall iTunes on Mac
During this time, you can drag and drop iTunes into the Trash. No error message appears. Empty the Trash and restart your Mac computer. You can uninstall iTunes app on Mac completely.
Way 3: How to Uninstall iTunes on Mac with Activity Monitor
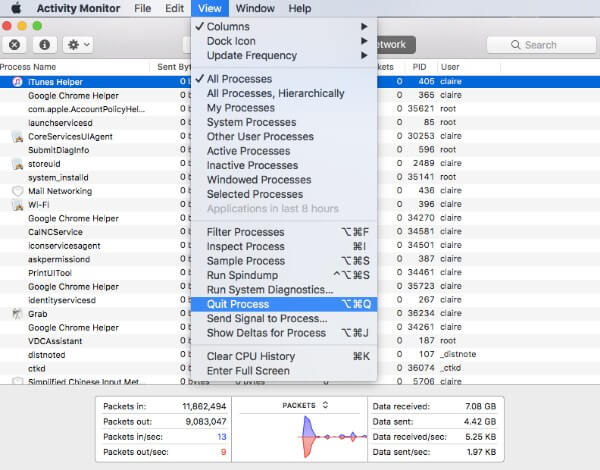
Step 1. Quit iTunes Helper
Turn off iTunes. Drag and drop iTunes icon to the Trash. Run Finder. Click “Go” > “Applications” > “Utility”. Find and click “Activity Monitor” from various choices. Highlight “iTunes Helper” in the list. Choose “Quit Process” from the top “View” list. When you are prompted with “Are you sure you want to quit this process?”, click “Quit” to confirm.
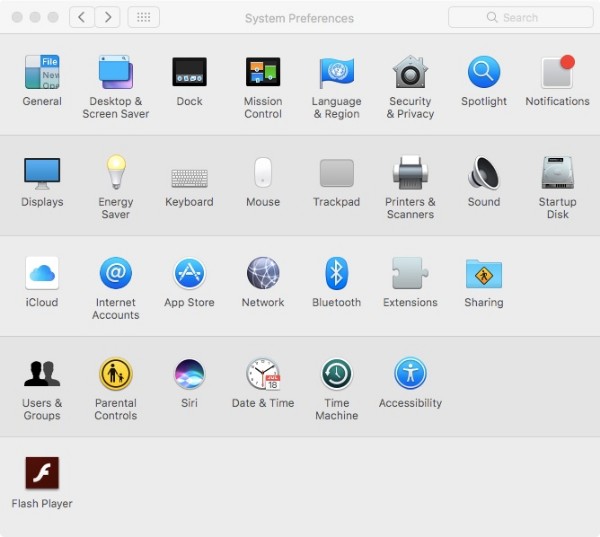
Step 2. Head to Mac login items
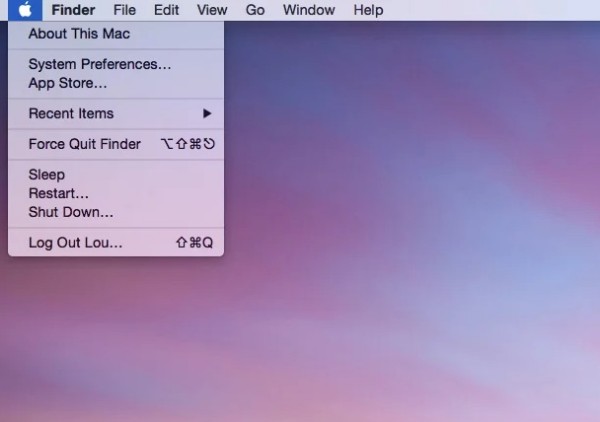
Click the “Apple” icon on the top left corner of the screen. Choose “System Preferences” from its list. Select “Users & Groups” to access your “Login Items” section. Check the option before “iTunesHelper”. Then click the “-” button below to remove iTunes.
Step 3. Uninstall iTunes with Activity Monitor
Head to the Finder App. Select “Go to Folder…” from the “Go” list. Copy and paste “/System/Library/Extensions” into the blank. Click “OK” to locate the “Extensions” folder.
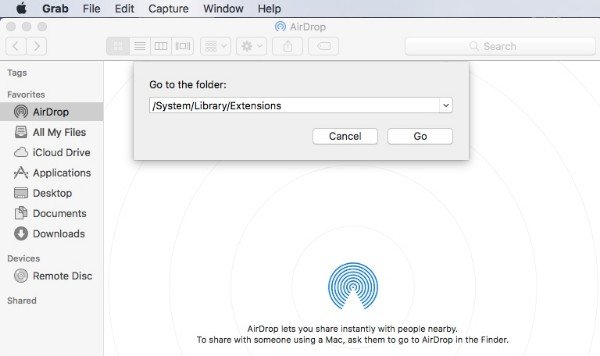
Drag and drop “AppleMobileDeviceSupport.pkg” into the Trash. It does not matter if you cannot find this file. Later, you can delete all iTunes associated files end in “.pkg”. After the iTunes uninstallation, empty the Trash and restart your Mac computer.
Part 3: Easiest Way to Delete iTunes Backups and Other Unneeded Files on Mac
Then how about your previous iTunes backups? If you want to uninstall iTunes and files completely, you can use Apeaksoft Mac Cleaner. The program can help you find and delete any unwanted files quickly. Thus, you can free up Mac storage space and speed up Mac system easily. Furthermore, Mac Cleaner can monitor your Mac performance in real-time. If you want to keep your Mac system in good state, you can free download Mac Cleaner for a try.
- Remove iTunes backups, app localization, system logs, caches files and other unneeded files quickly.
- Scan and delete large and old files selectively.
- Delete duplicate files and privacy data.
- Uninstall apps and remove associated files.
- Monitor system performance including disk utilization, memory usage, battery status and CPU usage.
If you do not want to use iTunes any more, you need to uninstall iTunes and related components completely. Otherwise, those iTunes related files still take up storage space on your Windows or Mac computer. The current latest version is iTunes 12.9.2 for Windows 64-bit. If you want to downgrade or reinstall iTunes, you can visit the Apple official site.

