When you delete a file on a Mac, it goes to the Trash Bin, which is a folder to store the deleted files. So that you can recover lost files if you delete them by accident. However, the deleted files are still on your hard disk and taking up your space. To free up space and improve the performance of your machine, you should empty Trash on Mac regularly. This guide lists seven ways to get the job done quickly.

- Part 1: How to Force Empty Trash on Mac
- Part 2: How to Empty Trash on Mac Automatically or Manually
- Part 3: How to Delete Specific Items in Trash on Mac
- Part 4: FAQs about Emptying Trash on Mac
Part 1: How to Force Empty Trash on Mac
According to our research, some people reported that they cannot empty Trash on Mac. The causes are complex, such as some of the files being currently in use, files being locked, and more. Apeaksoft Mac Cleaner is a powerful tool and can force empty the Trash folder on Mac.

4,000,000+ Downloads
Force empty Trash on Mac with one click.
Delete all Trash or specific files.
Won’t interrupt your files on your hard drive.
Offer multiple bonus features, like finding large files on Mac, checking storage on Mac, clearing junk files/caches/cookies, uninstalling apps, etc. on your Mac.
Here are the steps to force empty Trash on your Mac:
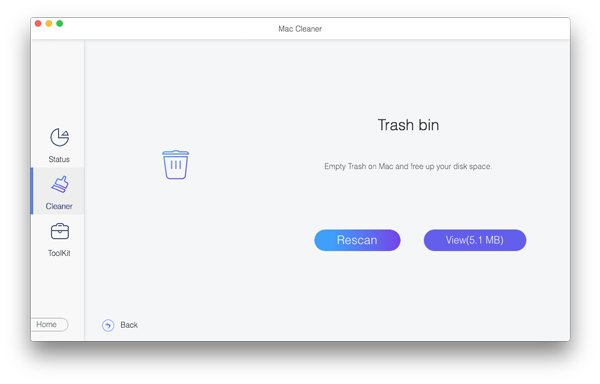
Step 1 Scan Trash on MacLaunch the best Trash erasing application after you install it on your Mac. Click the Cleaner button in the home interface, and choose Trash bin. Hit the Scan button to look for files in your Trash folder.
 Step 2Empty Mac Trash
When scanning is done, click the View button to enter the Trash folder. Here, you can check all deleted files in Trash Bin. Select unwanted files or all files, and click the Clean button to force empty Mac Trash immediately.
Part 2: How to Empty Trash on Mac Automatically or Manually
Apple has added the features to empty Trash on Mac automatically or manually. With the native features, you do not need extra apps to clean up your Trash Bin folder. Here are the native methods below:
Way 1: How to Empty Trash on Mac Automatically
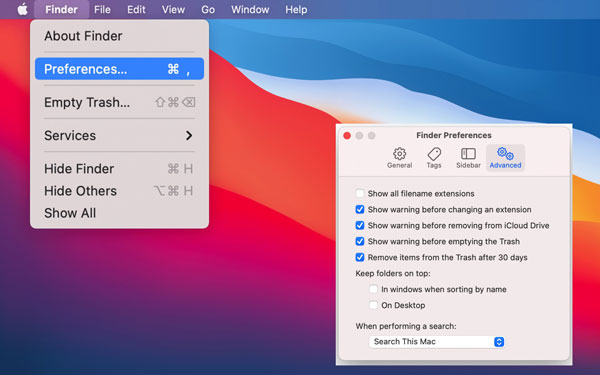
Step 1 Run your Finder app.
Step 2 Go to the Finder menu, and choose Preferences.
Step 3 Switch to the Advanced tab on the pop-up, and check the box of Remove items from the Trash after 30 days. Then your files in the Trash will be automatically deleted for 30 days.
Way 2: How to Empty Trash on Mac from Dock
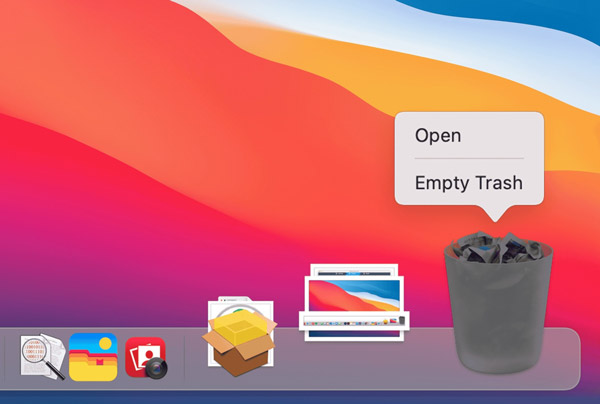
Step 1 Locate the Trash Bin at the bottom right corner.
Step 2 Right-click on Trash Bin, and choose Empty Trash on the context menu.
Step 3 When prompted, click the Empty Trash button to confirm emptying Trash on MacBook Pro/Air, or iMac.
Note: This way won’t delete locked files.
Way 3: How to Empty Trash on Mac in Finder
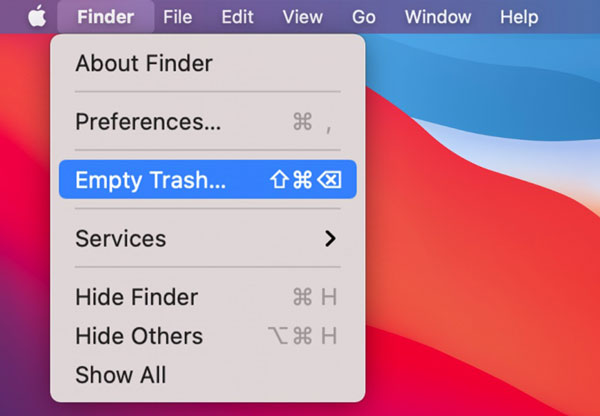
Step 1 Open the Finder app from your Dock panel.
Step 2 Head to the Finder menu, and choose Empty Trash.
Step 3 Click the Empty Trash button on the alert dialog.
Way 4: How to Empty Trash with a Shortcut

Another quick way to empty Trash on a Mac is the shortcut. Whenever you intend to free up your Trash folder, navigate to your desktop, and press the Shift + Command + Return keys on your keyboard at the same time. Also, you need to confirm the action.
Way 5: How to Empty Trash Using Terminal
For advanced users, command lines are another way to empty Trash on Mac. This way can delete files that moved to Trash on Mac effectively and quickly. You can follow the steps below to clean up your Trash Bin.

Step 1 Launch the Terminal window.
Step 2 Input the command sudo rm -R, locate the files that you intend to delete, and drag them into the Terminal window.
Step 3 Press the Return key on your keyboard. When prompted, enter the admin password, and hit the Return key again
Part 3: How to Delete Specific Items in Trash on Mac
In addition to emptying the entire Trash on Mac, you can also access the Trash folder, and delete specific items. Before that, you should know where is the Trash folder on your Mac, and then you can delete specific files or all of them.
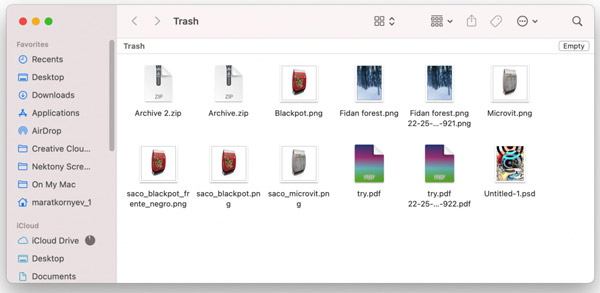
Step 1 Locate the Trash Bin at the bottom right corner of the Dock panel. Right-click on it, and choose Open. Or press the Command + Shift + G keys on your keyboard, and type in Trash to access the Trash folder directly.
Step 2 If you intend to delete specific items, hold the Command key while selecting the files.
Tip: To empty Mac Trash, click the Empty button at the top right side, and confirm the action.
Step 3 Control-click a selected file, and choose Delete Immediately on the context menu. Then click the Delete button on the pop-up to confirm the action.
More Related:Part 4: FAQs about Emptying Trash on Mac
Can I delete files on Mac without moving them to Trash?
Yes. If you wish to delete files on Mac without moving them to Trash, open the Finder app, click on the target file or files, and press the Option + Command + Delete keys on your keyboard. Then click Delete on the alert dialog.
How to recover a file from the Trash folder?
Open the Trash folder from your Dock panel, right-click on the file or files that you want to recover, and choose Put back. Or select the files, go to the File menu, and choose Put back.
How do I safely empty Trash on Mac?
Once you empty Trash on Mac, all files are deleted permanently from your hard drive. The action is safe and won’t interrupt other files on your disk.
Conclusion
This guide has listed seven ways on how to empty Trash on Mac quickly. The native features allow you to empty the entire Trash folder or delete specific files through multiple channels. If you cannot empty your Trash folder, Apeaksoft Mac Cleaner can help you do the job. More questions? Please write them down below this post.

