According to recent survey, iPhone users are more likely to take photos using their smartphone than other Android users, partly because the Apple's advanced lens technology. However, high quality photos take much more space, which makes deleting photos from iPhone a necessary skill.

Some people reported that they can't delete photos from iPhone and cannot find the trash icon in the iPhone Photos app. Apple does not clear the reason why this problem happens and it seems a bit complicated. Anyway, in this tutorial, we are going to show you what to do when you can't delete photos from iPhone.
- Part 1: Why I can't delete photos from iPhone?
- Part 2: How to solve "can't delete photos from iPhone" using iTunes
- Part 3: A best way to manage and delete photos from iPhone
- Part 4: An ultimate way to delete photos from iPhone
Part 1: Why I can't delete photos from iPhone?
There are two situations that you can't delete photos from iPhone.
Firstly, when iCloud Photo Stream and Photo Library are enabled and you select Optimize iPhone Storage, the photos on your device are just a copy of the full-resolution versions. In such case, your photos are stored in iCloud actually and cannot be deleted from iPhone of course.
Plus, if the photos on your device that have synced from iTunes library, you can't delete them from iPhone.

Part 2: How to solve "can't delete photos from iPhone" using iTunes
When encounter the problem can't delete photos from iPhone, iTunes is effective way to remove them.
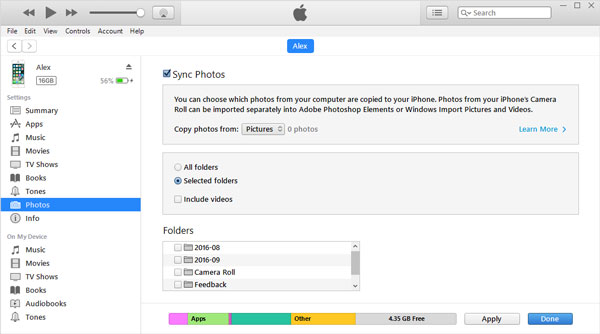
Step 1. Plug your iPhone to your computer via a USB cable. Start the latest version of iTunes. After it detects your iPhone, click the "Device" button at upper left corner.
Step 2. Locate to left side, select "Photos" under "Settings". Tick the "Sync Photos" checkbox and uncheck the folder contains the photos can't delete from iPhone under "Folders" area.
Step 3. Next, click the "Apply" button to confirm it. Turning to your iPhone, you will discover that the photos you want to delete are gone.
Part 3: A best way to manage and delete photos from iPhone
As you can see, your iPhone display both the photos on your device and the pictures synced to your device. But we cannot distinguish the differences, which is the main reason why can't delete photos from iPhone. Apeaksoft iPhone Transfer could help you simplify the process of removing photos from your device. Its key features include:
- Recognize and organize all photos on your iPhone automatically.
- Back up photos from iPhone to computer in original quality before deleting them.
- Preview all photos on your device and delete photos as you wish.
- Select multiple photos and delete them from your iPhone in one click.
- In addition to photos, it also supports a wider range of data types, like music, videos, contacts, call history, app data and more.
- Work on all iPhone models, including iPhone 16/15/14/13/12/11/X, etc.
- Available to Windows 11/10/8/8.1/7/XP and macOS.
In short, it is the best way to fix the problem can't delete photos from iPhone.
How to fix can't delete photos from iPhone effectively
Step 1. Install the best iPhone photo manager on your computer
Download and install Apeaksoft iPhone Transfer to your computer. It offers one version for Windows PCs and another one for Mac. Connect your iPhone to your computer via the original Lightning cord. Launch iPhone Transfer to let it detect your iPhone 8 automatically.

Step 2. Preview photos on iPhone 8 before deleting
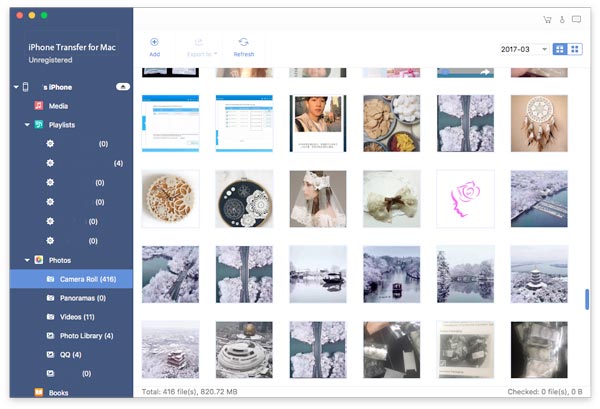
Click the name of your iPhone at upper left corner of the home interface; select the Photos option on left sidebar to go to the detail window. Here you can view all photos on your device.
Step 3. Fix can't delete photos from iPhone
Now, tick the checkbox in front of each photo that you want to delete from your iPhone, and click the Delete menu with a trash icon on top ribbon to delete them immediately.
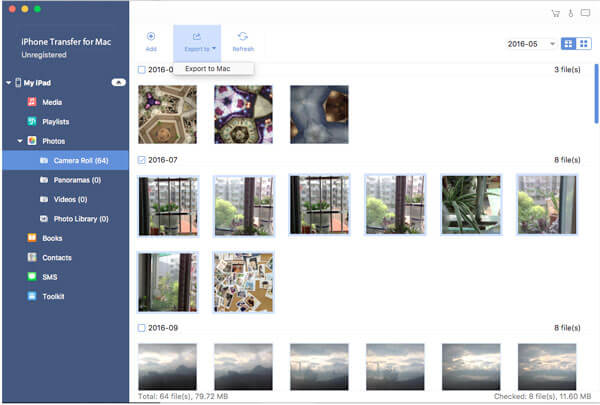
To avoid data loss, you'd better back up the selected photos to your computer by clicking Export to MAC in the Export to menu on top of the window.
Part 4: An ultimate way to delete photos from iPhone
In some cases when encountering the problem that can't delete photos from iPhone, you can try a professional solution, Apeaksoft iPhone Eraser. It has the ability to erase photos and other data from your iOS device permanently using the advanced technology.
Moreover, once the photos are deleted with iPhone Eraser, they are not recoverable. So, you can use it to protect your privacy and information. In a word, it is the best option to fix can't delete photos from iPhone at one time.
How to delete photos from iPhone in one click
Step 1. Connect iPhone to the best iPhone erasing application
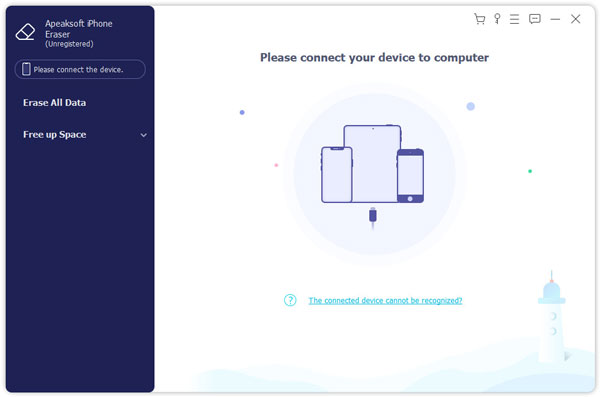
Install the right version of the best iPhone erasing application on your computer according to your operating system. Hook up your iPhone device to your computer via a USB cord. Open iPhone Eraser and start deleting photos on iPhone.
This way will erase photos and other date on your device complete, so you'd better back up your iPhone to iCloud or iTunes.
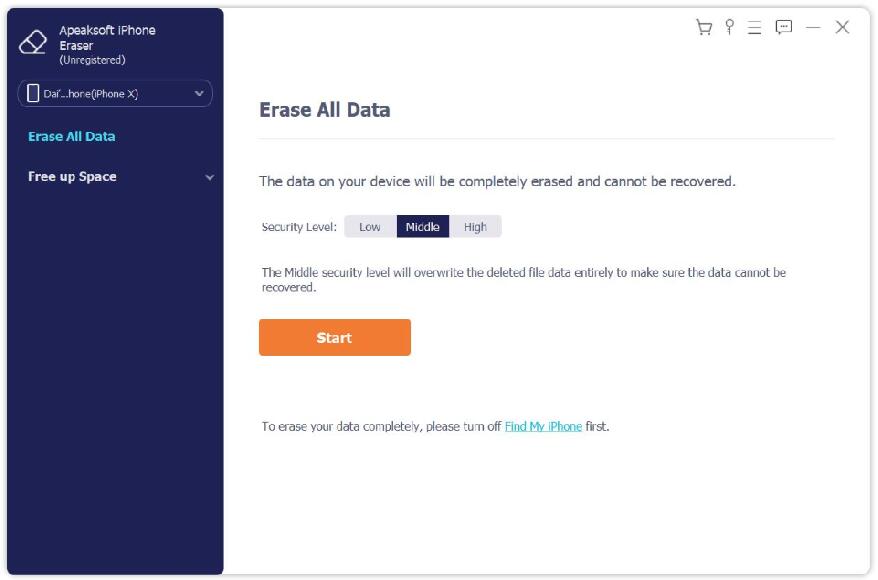
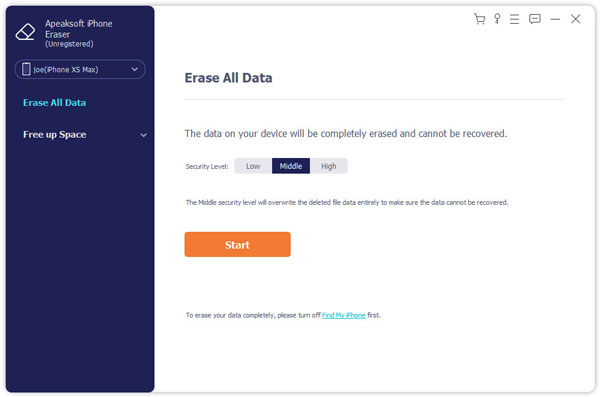
Step 2. Select an erasing level
Next, you will face three options related to erasing level, Low, Medium and High. The first one overwrites your iPhone one time; the second one does it twice and last one overwrites your device three times. Make a decision according to your situations.
Step 3. Delete photos in one click
After the selection, click the Start button on the window to start erasing photos and other personal data on your device. When the process is complete, remove your iPhone from your computer. Restart your device and recover the necessary data from iCloud or iTunes backup except unwanted photos.
Conclusion:
As time goes by, you may accumulate many high quality photos on your iPhone, and get the alert of no enough storage. To get your device working normally, you can delete unwanted photos. However, some people encounter the problem that can't delete photos from iPhone. In this tutorial, we have shared multiple solutions to fix this problem and delete photos to free up storage. You can choose the proper method based on your situations. If you have more questions about deleting photos on iPhone, feel free to leave a message below this article.

