How to Back up and See Photos on iCloud Using iPhone and Mac
According to our research, Apple customers are more likely to take photos with their handsets partly because of the built-in excellent lens technology. However, the limited internal storage is a big problem. Therefore, more and more people back up photos to iCloud and then free up space. However, the setup of photo backup on iPhone, iPad, or Mac is not straightforward. This guide tells you how to do it on iPhone, iPad, and Mac properly.
PAGE CONTENT:
Part 1: How to Back up Photos to iCloud on iPhone/iPad
If you are someone who loves taking photos and owns an iPhone, it is great to know that Apple provides a considerable amount of iCloud storage for your photos regardless of what model you are using. It is quick and easy to back up photos to iCloud from iPhone or iPad.
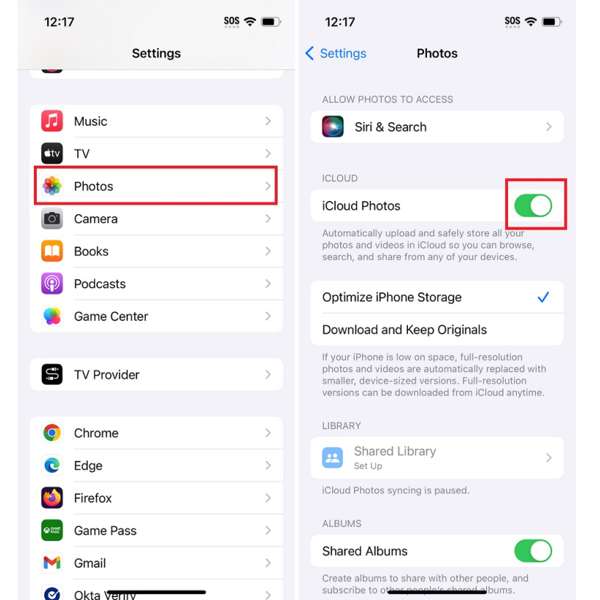
Step 1. Connect your iPhone to a reliable network.
Step 2. Open the Settings app from your home screen. Scroll down and find the Photos option, and tap it.
Step 3. Then toggle on iCloud Photos. If you want to delete the backed-up photos, select Optimize iPhone Storage. If not, select Download and Keep Originals.
Note:
If you back up photos to iCloud with cellular data, scroll down and tap Mobile Data, and toggle on Mobile Data.
Part 2: How to Back up Photos to iCloud on Mac
iCloud is not exclusive to iOS devices. You can back up photos to iCloud from MacBook too. If you have enough iCloud storage space, follow the steps below to upload your photos to iCloud.
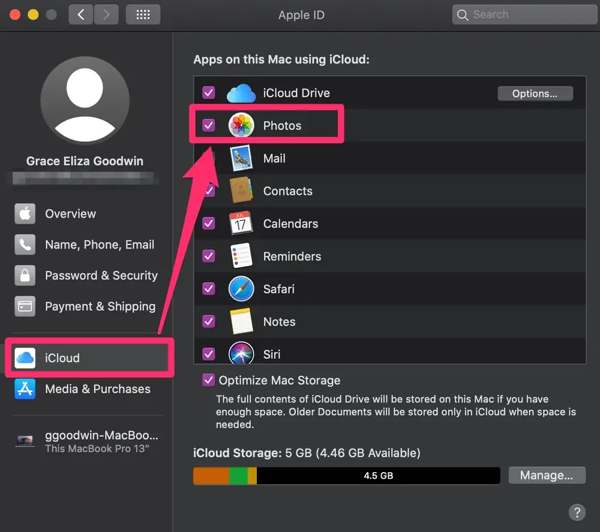
Step 1. Click the Apple menu, and choose System Settings or System Preferences.
Step 2. Click Apple ID at the top right corner to open the Apple ID page, and choose iCloud from the left side.
Step 3. Check the box next to the Photos option under the Apps on this Mac using iCloud section. If prompted, enter your Mac password.
Part 3: How to See iCloud Backup Photos
One benefit of iCloud backup is viewing photos anywhere. Unlike iCloud backups, you do not need to overwrite your device. We demonstrate the workflow for each platform respectively below.
How to See iCloud Backup Photos on iPhone/iPad
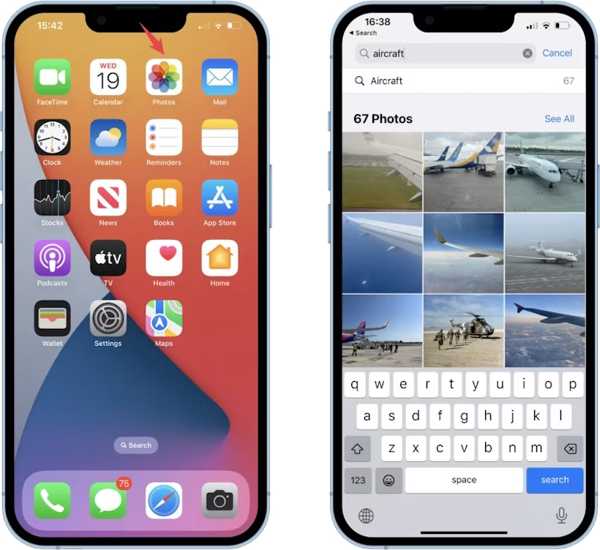
Step 1. Make sure you have enabled iCloud Photos in the Settings app.
Step 2. Run the Photos app, go to the Library, and see iCloud backed-up photos by years, months, or days.
Step 3. If you cannot find the backup photos, open the Settings app, choose Photos, toggle off iCloud Photos, and turn it back on. Then go to the Photos app.
How to View iCloud Backup Photos on Mac
Step 1. To view iCloud backup photos on Mac, open the Finder app, and locate the Applications folder.
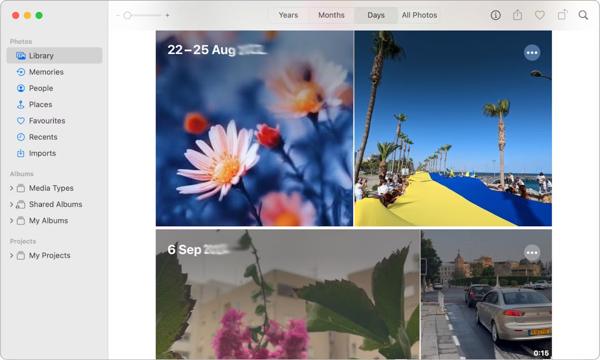
Step 2. Open the Photos app, go to an album, and view the photos.
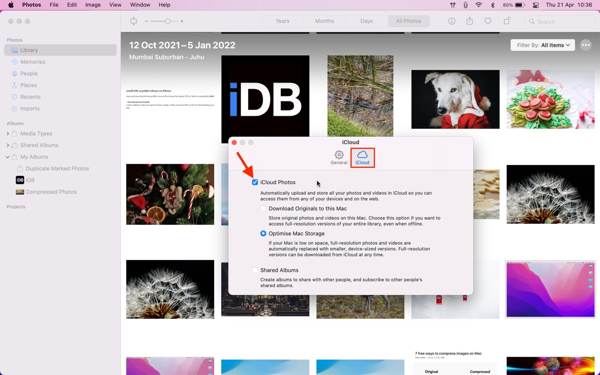
Step 3. If you cannot see the original photo quality, click Photos in the Mac Photos app, and select Settings or Preferences. Go to the iCloud tab, enable iCloud Photos, and select Download Originals on this Mac.
How to View iCloud Photos on a PC
Step 1. When you need to view iCloud backup photos on a PC, start iCloud for Windows. You can download the program from Microsoft Store or Apple’s website.
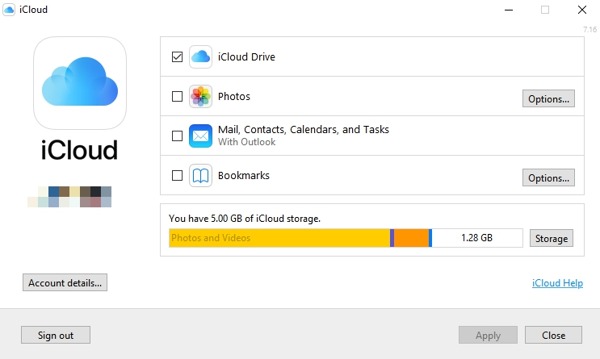
Step 2. Sign in with your Apple ID and password. Then tick the checkbox next to Photos to download iCloud backup photos.
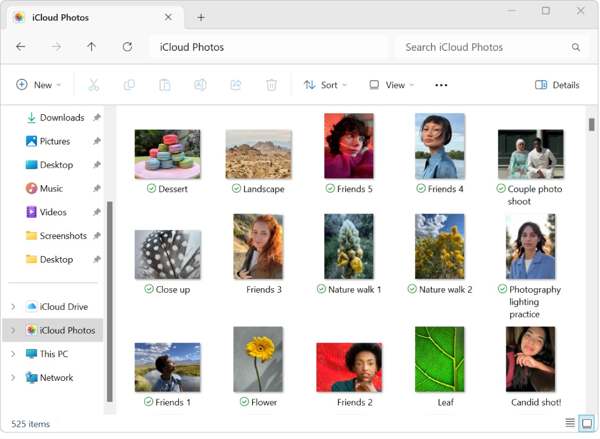
Step 3. Open a File Explorer window, and go to iCloud Photos on the navigation bar. Then you can view your photos.
How to See iCloud Backup Photos on the Web
Step 1. If you want to see iCloud backed-up photos on the web, visit www.icloud.com, and sign in with your Apple ID and password.
Tips: If you have set up 2FA, enter the verification code that appears on your screen.
Step 2. Click the Photos option to enter the iCloud Photos page. Then you can see all iCloud photos.
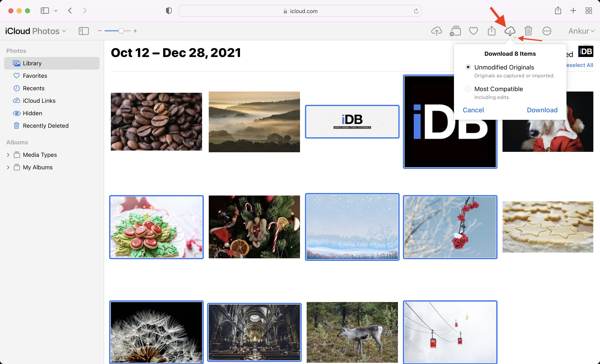
Step 3. To download specific photos, select them, and click the Download button.
Part 4: How to Back up Photos Without iCloud
The biggest disadvantage of iCloud is the limited storage space. Plus, the subscription is pretty expensive. From this point, we recommend Apeaksoft iOS Data Backup & Restore. It enables you to back up iPhone photos and videos to your computer quickly.
Best iCloud Alternative
- 1. Back up iPhone photos to computer.
- 2. View backup photos on the computer easily.
- 3. Restore selective photos to the iPhone quickly.
- 4. Encrypt iPhone photo backup with a password.
- 5. Support the latest versions of iOS.
Secure Download
Secure Download

How to Back up Photos Without iCloud
Step 1. Recognize your iPhone
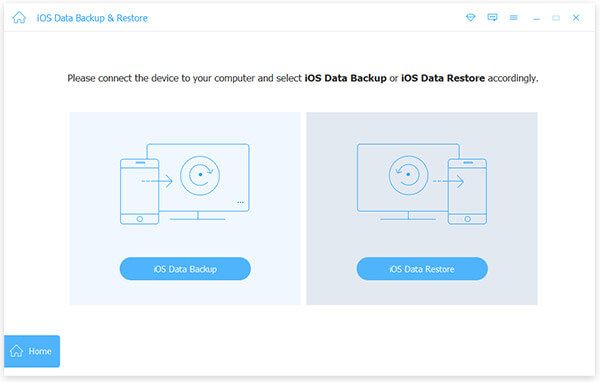
Launch the best iPhone backup tool as long as you install it on your PC. There is another version for Mac users. Next, connect your iPhone to your computer with a Lightning cable. Once your device is recognized, click the iOS Data Backup button to move on.
Step 2. Select data types
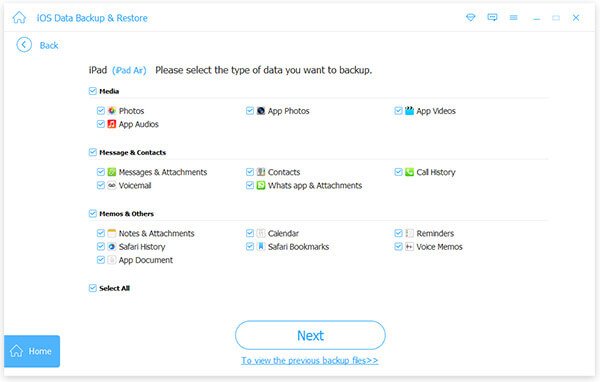
If you want to protect the backup, select Encrypted backup, and leave a password. If not, select Standard backup instead. Next, click on the Start button to enter the data type screen. Tick the checkboxes next to Photos and other data types that you want to back up. You can also back up WhatsApp messages on your iPhone to your PC.
Step 3. Back up iPhone photos
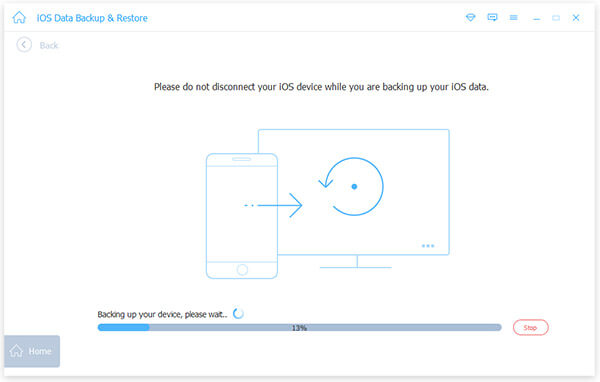
Once you are ready, click on the Next button. Then select a destination folder and begin backing up iPhone photos without iCloud. For iOS 13 and above, you need to enter the passcode to back up the Call history and Safari history. When it is done, disconnect your iPhone.
Note:
If you wish to view backup iPhone photos, click iOS Data Restore in the home interface, select a backup file, and click View Now.
Conclusion
This guide has demonstrated how to back up photos to iCloud from an iPhone, iPad, or Mac. Plus, you can see iCloud backup photos on iOS, Mac, Windows, and online easily. Apeaksoft iOS Data Backup & Restore is the alternative to iCloud for photo backup. If you have other questions about this topic, please feel free to write them down below.
Related Articles
Want to set up a new iPhone from iCloud? Here we offer 4 highly feasible methods to help you upload iCloud data to your new iPhone. Read and explore with us!
iPhone won't backup to iCloud or iCloud backup cannot be completed? Here are 6 real solutions to fix it on iPhone 15/14/13/12/11, etc. running in iOS 17/18.
How to delete photos from iPhone without deleting from iCloud and other synced Apple devices like Mac? Learn to delete pictures from iPhone iPad but not iCloud.
There are five effective methods to transfer photos from iPhone to Android using Google Photos, email, a computer, and more.

