Step-by-step Guide to Back up iPhone/iPad to iCloud
The iPhone is far more than just a screen for texting and calling. Users access a variety of apps and data on their iOS devices. However, carrying all of that information in our pockets is not a good idea due to the limited internal storage on iPhones. Fortunately, Apple introduced iCloud for iOS users. Every account can get 5GB of free storage. This guide explains how to back up your iPhone with iCloud manually or automatically.
PAGE CONTENT:
Part 1: How to Back up iPhone to iCloud
iCloud is the easiest way to make a copy of an entire iPhone without a computer. The backups include any data on your device that isn’t synced in iCloud. With proper settings, you can back up your iPhone to iCloud manually and automatically. We demonstrate the workflows respectively.
How to Back up iPhone to iCloud Manually
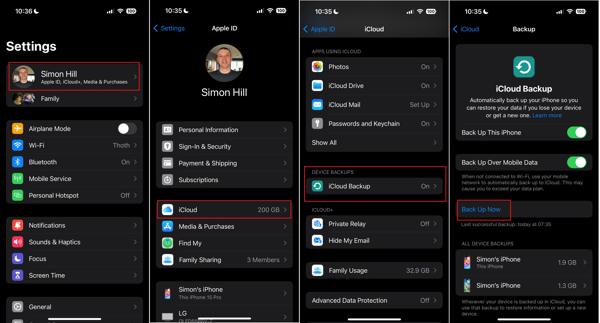
Step 1. Run the Settings app from your home screen. Make sure to connect your iPhone to a stable Wi-Fi network.
Step 2. Tap on your profile at the top of the screen, choose the iCloud option, and press iCloud Backup under the DEVICE BACKUPS section.
Step 3. Tap the Back Up Now button to begin backing up your iPhone to iCloud. When it is done, you will see the message of Last successful backup below the Back Up Now button.
Tips: You can follow similar steps to back up your iPad so that you can easily recover deleted photos, messages, etc., on iPad.
How to Back up iPhone to iCloud Automatically
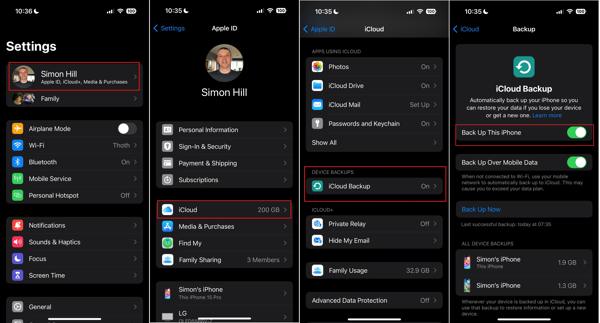
Step 1. To automatically back up iCloud on your iPhone, open the Settings app, and tap on your profile.
Step 2. Head to iCloud, and iCloud Backup.
Step 3. Toggle on the switch of Back Up This iPhone. Once your iPhone connects to the internet, iCloud backup will initiate.
Note: If you intend to back up your iPhone through cellular data, turn on Back Up Over Mobile Data.
Part 2: How to Fix iPhone Won't Backup to iCloud
It is difficult to figure out why the iPhone won't back up to iCloud; however, there are solutions to fix this problem. You can follow the verified solutions to effectively make iCloud backup work again.
Solution 1: Check Internet Connection
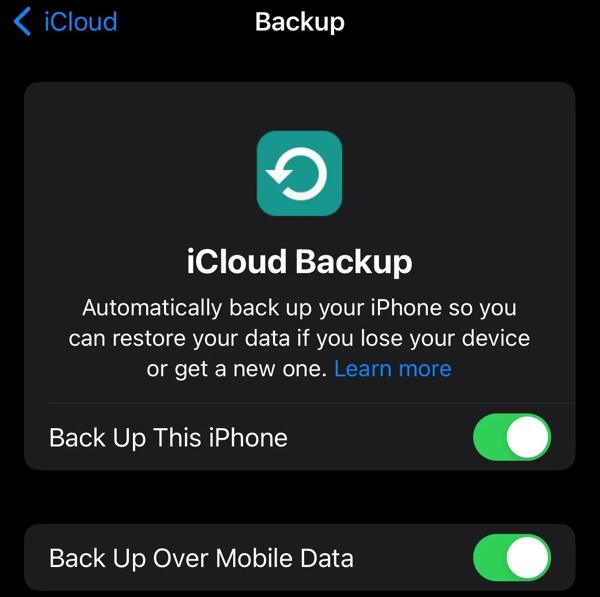
As a cloud backup storage, iCloud works through an internet connection. When an iPhone won't back up to iCloud, the first thing you should do is check your network. If you are using cellular data, enable Back Up Over Mobile Data.
Solution 2: Authenticate Your Apple Account
iCloud relies on your Apple ID to back up and sync data on your iPhone. Sometimes, you may change the information on your account but forget to update it on your iOS device. That leads to iCloud backup not working normally.
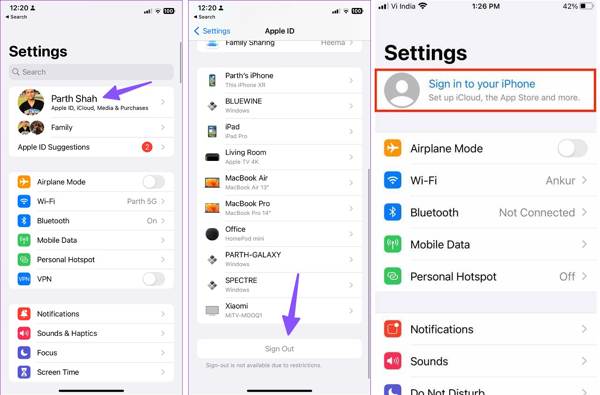
Step 1. Open the Settings app, tap on your profile, and tap the Sign Out button.
Step 2. Then tap Sign Out again.
Step 3. Next, tap Sign in to your iPhone, and enter your Apple ID and password.
Solution 3: Expand iCloud Storage
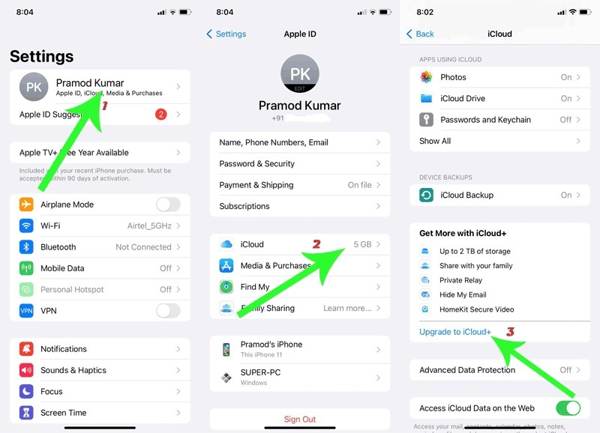
By default, iCloud only comes with 5GB of free storage. If you store lots of data on your iPhone, you may run out of free cloud storage quickly. To expand your iCloud storage, tap on your profile in the Settings app, choose iCloud, and tap Upgrade to iCloud+. Then choose an appropriate plan.
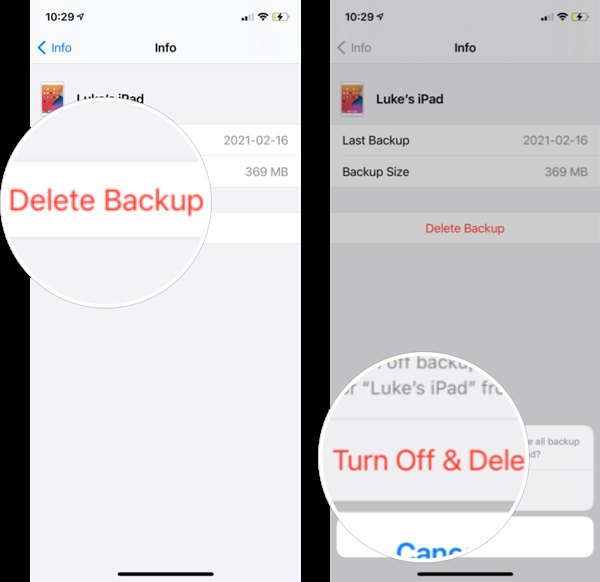
If you do not want to expand iCloud storage, you have to delete the old backups. Run the Settings app, tap on your profile, go to iCloud, choose Manage Store, and press Backups. Then press your device name, tap Delete & Turn Off Backup, and confirm it.
Solution 4: Update Software
Outdated software may be another reason why the iPhone won’t back up to iCloud. Apple fixes bugs and adds new features to each update. You’d better keep software up to date on your iPhone.
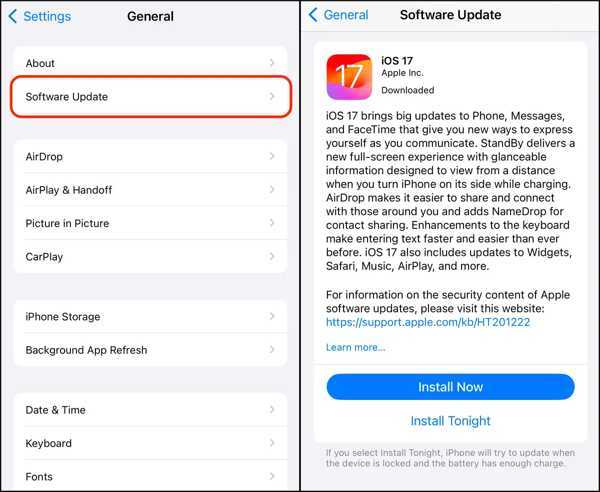
Step 1. Run the Settings app.
Step 2. Go to the General tab, and tap Software Update to search for available updates.
Step 3. Then tap the Install Now button to install the latest iOS.
Solution 5: Check iCloud Status
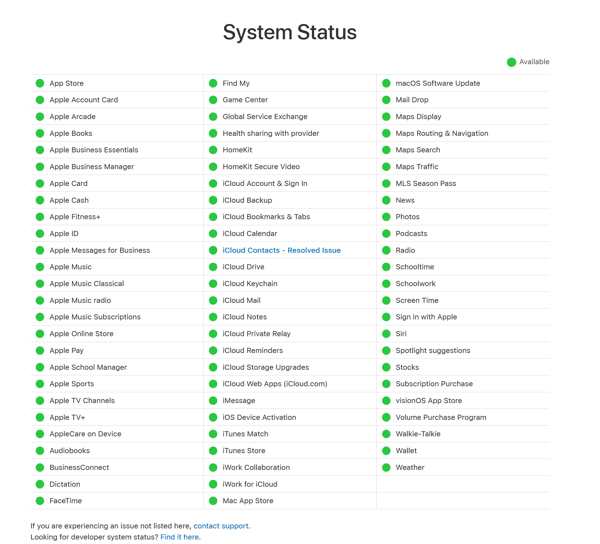
All iCloud backups are stored on Apple servers. If Apple servers are down, you have to wait for them to work again and back up your iPhone to iCloud. Visit www.apple.com/support/systemstatus/ in a web browser, and check the status of servers involved with iCloud.
Part 3: Best Alternative to iCloud for Backup iPhone
iCloud is just one way to back up iPhone but not the best method. The limited storage is a big problem. Plus, iCloud backs up your iPhone with an internet connection and it is slow. The alternative solution is backing up the iPhone to a computer without iCloud. From this point, we recommend Apeaksoft iOS Data Backup & Restore. Moreover, it lets you restore your iPhone backup without overwriting your device.
Best iOS Backup Tool
- Back up the iPhone to a computer with a single click.
- Make a copy of the entire iPhone or specific data types.
- Encrypt iPhone backups with a password.
- Preview and restore iPhone backup easily.
- Support a wide range of iPhones and iPad models.
Secure Download
Secure Download

How to Back up Your iPhone to Computer Without iCloud
Step 1. Scan your iPhone
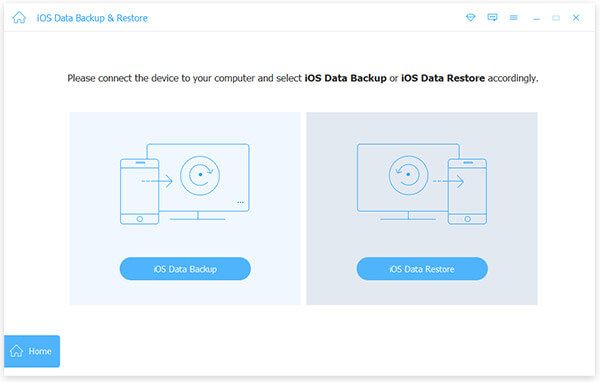
Launch the best iOS backup software once you install it on your PC. There is another version for Mac users. Choose iOS Data Backup & Restore, and connect your iPhone to the computer with a Lightning cable. Click the iOS Data Backup button to continue.
Step 2. Select data types
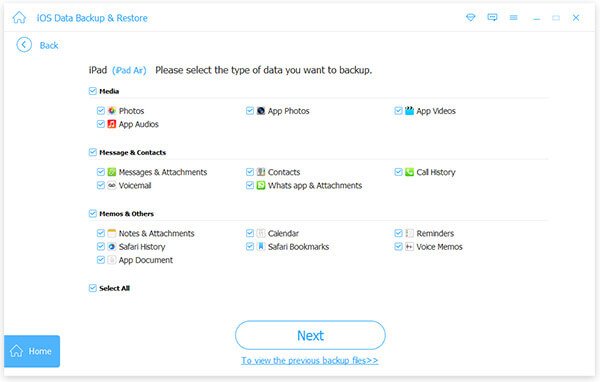
If you want to encrypt your iPhone backup, select Encrypted backup, and leave a password. Otherwise, select Standard backup. Then you will be presented with the data type window. Here you can select what you want to back up. To back up the entire device, check the box next to Select All.
Step 2. Back up the iPhone
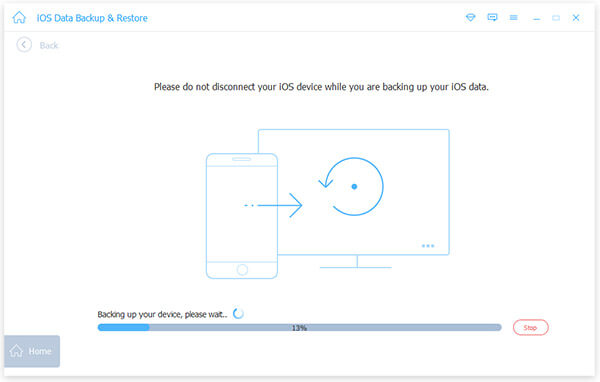
At last, click the Next button. Then set a directory to save the backup file and begin backing up your iPhone to a computer without iCloud.
Conclusion
This guide has demonstrated how to back up your iPhone to iCloud. It is an easy way to store your important information in Apple’s cloud storage. Furthermore, we told you what you can do when iCloud backup is not working. Apeaksoft iOS Data Backup & Restore is the best alternative solution to back up your device. Other questions? Please write them down below.
Related Articles
Want to set up a new iPhone from iCloud? Here we offer 4 highly feasible methods to help you upload iCloud data to your new iPhone. Read and explore with us!
If it takes too long to update iCloud settings, don't worry about that. Here're 8 ways to fix iPhone stuck on updating iCloud settings. Just read and follow.
This post will tell you how to remove an iCloud account from iPhone without password. If interested, please read on and learn the detailed steps.
The most reliable way to avoid losing important WhatsApp information is to back it up regularly. This article will guide you on how to back up WhatsApp.

