Photos and videos are the first storage killers if we have used our iPhones for several years. Now, it is essential to find an external storage device. External hard drives serve as an optimal option to free our phones' and computers' storage or backup photos to preserve our memory.
How to transfer photos from iPhone to external hard drive? This article illustrates seven methods suitable for everyone, even if your computer runs old Windows or MacOS.

- Part 1. Export iPhone Pictures to External Hard Drive Without Storage Limitation
- Part 2. How to Transfer Photos from iPhone to External Hard Drive on Windows PC
- Part 3. How to Move Photos from iPhone to External Hard Drive on Mac
- Part 4. Import iPhone Pictures to External Hard Drive with iCloud on Windows/Mac
- Tips: How to Transfer Photos from iPhone to Flash Drive
Part 1: Export iPhone Pictures to External Hard Drive Without Storage Limitation
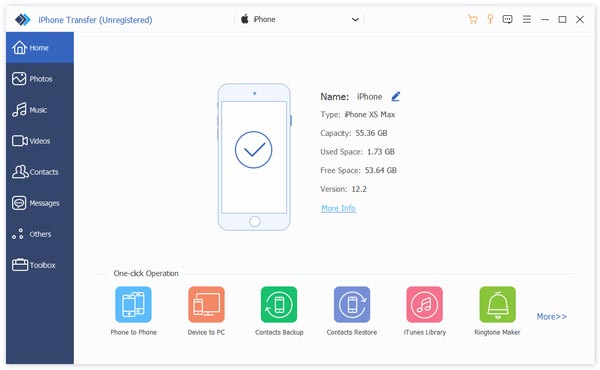
Apeaksoft iPhone Transfer is a computer program compatible with Windows and Mac. It allows you to connect your iPhone to your computer and access your iPhone files on your computer. Its interface is concise, ensuring you manage your iPhone data on the computer in the same manner as you navigate photos and files on the iPhone, only with the difference in screen size.
You can delete, add, or export photos directly in Apeaksoft iPhone Transfer; the same change will instantly be done on your iPhone. Of course, you can move photos to the computer or any external drive connected to the computer. Apart from this, it also has many outstanding features.

4,000,000+ Downloads
Manage, export, or import photos, videos, music, eBooks and documents of iDevices with ease.
Transfer files between iPhone, iPad, iPod and computers or external drives.
Backup and restore contacts in one click and make ringtone.
One click to back up all photos and back up all data on an iPhone or iPad.
Step 1 Use your iPhone's original USB cable to connect your iPhone to your computer. If your iPhone pops up a window, tap Trust or Allow so that it can be connected successfully. Launch the program on your computer, and you can see your iPhone's name.
Step 2 Attach the external hard drive to your computer.
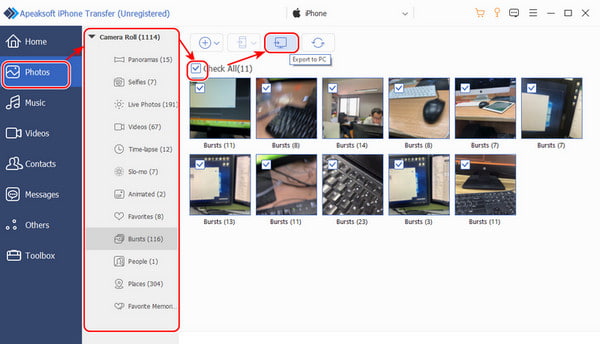
Step 3 On the left bar, click Photos and select photos you want to export to the drive. Then, click the computer button and select your external drive path.
1. If you are using Windows and the Apeaksoft iPhone Transfer reminds you to upload the latest version of iTunes, you should download iTunes through the link in the interface. Updating to the latest version also works when iTunes is slow.
2. The former instruction copies photos to an external drive but won't delete them from your iPhone. You can simply delete them from the program after the transfer is finished.
Part 2: How to Transfer Photos from iPhone to External Hard Drive on Windows PC
1. Export iPhone Pictures to External Hard Drive with Photos
Photos is a photo manager, viewer, and editor in Windows 10 and Windows 11. It supports importing photos from external devices or OneDrive to a computer. We can export iPhone pictures to an external hard drive with the Photos app on a Windows computer.
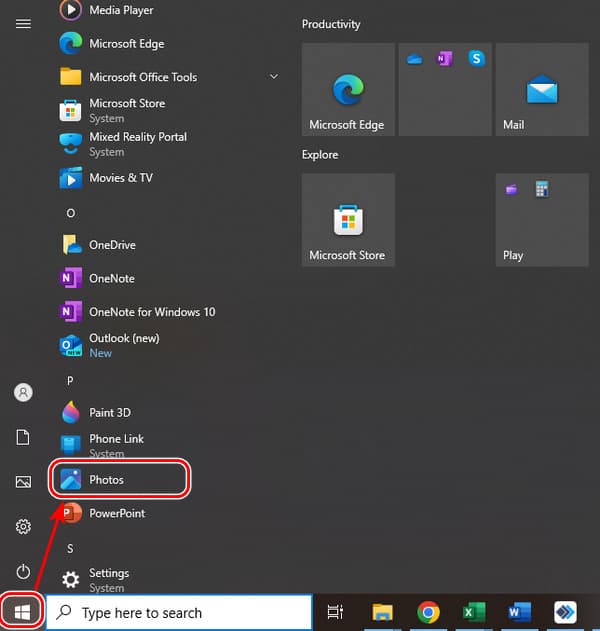
Step 1 Connect your iPhone to Windows with a USB-C cable and attach the drive to your computer. Open the Photos app from the start.
Step 2 In the Photos interface, click Import in the top right corner and choose your iPhone.
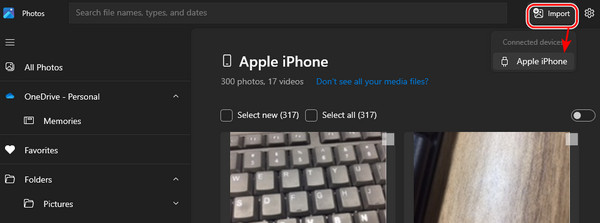
Step 3 Once all photos are selected, click the import button, specify the external drive path and click Import.
2. Move iPhone Photos to External Hard Drive with Explore
The Photos program is unavailable if you are using Windows 7 or any older Windows system than Windows 10. However, you can move iPhone photos to an external hard drive using the default file management program Explore.
Step 1 Attach your iPhone to the Windows PC via a USB cable and plug in the hard drive, too.
Step 2 Explore will automatically pop up if the two connections are established. Drag to import the photos from the DCIMfolder to your external hard drive folder.
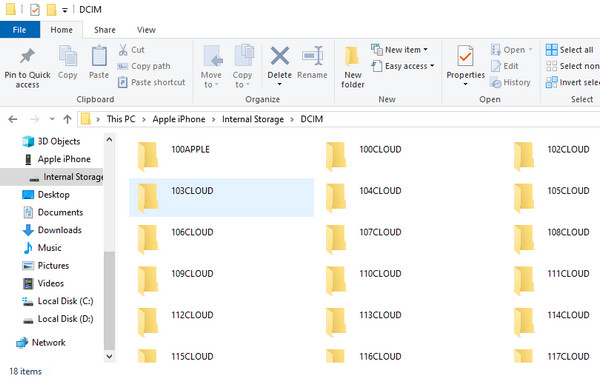
Folders start from 100 APPLE or 100 CLOUD in the time sequence. Usually, the bigger the number, the later the time. You can recover DCIM pictures if you still can't find your photos.
Part 3: How to Move Photos from iPhone to External Hard Drive on Mac
1. Transfer iPhone Images to External Hard Drive with Image Capture
Image Capture is the inbuilt default program of macOS since macOS High Sierra and still provides photo importing functions in higher versions of macOS now. Using a Mac with the Image Capture app, let's see how to transfer photos from iPhones to external hard drives.
Step 1 To attach your iPhone to the computer, plug it with a USB cable and plug in the hard drive, too.
Step 2 Explore will automatically pop up if the two connections are established. Drag to import the photos from the DCIM folder to your external hard drive folder.
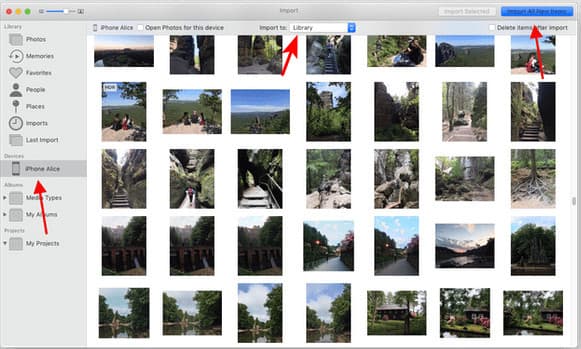
2. Preserve iPhone Photos to External Hard Drive Using Photos App
The photos app was first issued on MacOS Yosemite (10.10), and we can use it in later versions. Importing photos from an iPhone to an external drive with the Photos app on a Mac is similar to on Windows.
Step 1 As the same step in Windows Photos, connect the external drive and iPhone to your computer.
Step 2 Launch Photos, click your iPhone name and select pictures.
Step 3 Specify your drive address beside Import to and click Import [n] Selected.
Part 4: Import iPhone Pictures to External Hard Drive with iCloud on Windows/Mac
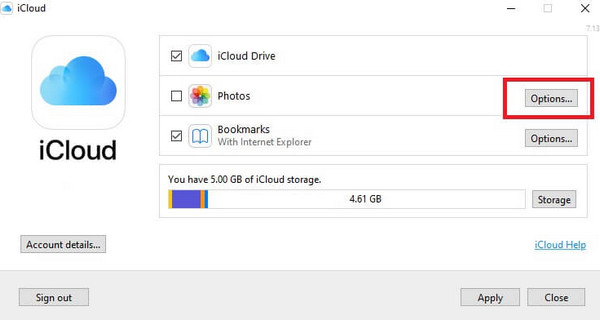
You can download iCloud for most versions of Windows and Mac. Therefore, you can sync your photos to iCloud and download them to your computer. Then, it will be easy to export them to an external drive.
Step 1 Turn on iCloud Photo Library
On your iPhone and Mac, go to the Settings app and click your device name. Turn on iCloud Photo Library in the Photos section.
On Windows, download and install iCloud for Windows and log in to your Apple ID. Click Options beside Photos and check iCloud Photo Library.
Step 2 Select and download pictures from iCloud and move them to the external drive path.
Tips: How to Transfer Photos from iPhone to Flash Drive
Flash drives, like USB, are another option for storing photos. They are smaller but have more extensive storage space than hard drives. Moreover, they preserve data longer in time than hard drives. More importantly, you can transfer photos from iPhone to USB sticks without a computer. How to transfer photos from iPhone to USB? It's easy!
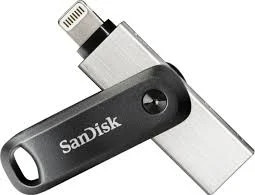
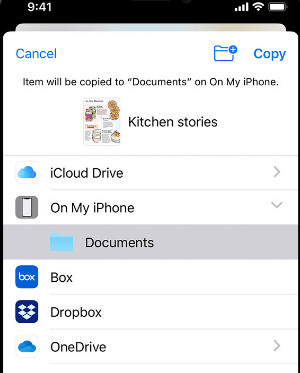
Step 1 Plug your USB stick into your iPhone.
Step 2 Open Photos, select the pictures you want to export to USB and tap the share button.
Step 3 Choose On My iPhone and select the USB drive folder.
Conclusion
Exporting iPhone pictures to an external hard drive is efficient using the seven methods. Apeaksoft iPhone Transfer is an easy and organized way among the seven. Before you start any way, make sure you have successfully connected your iPhone and hard drive to your computer.